Crispy Cottage Cheese Chips Easy Healthy Snack
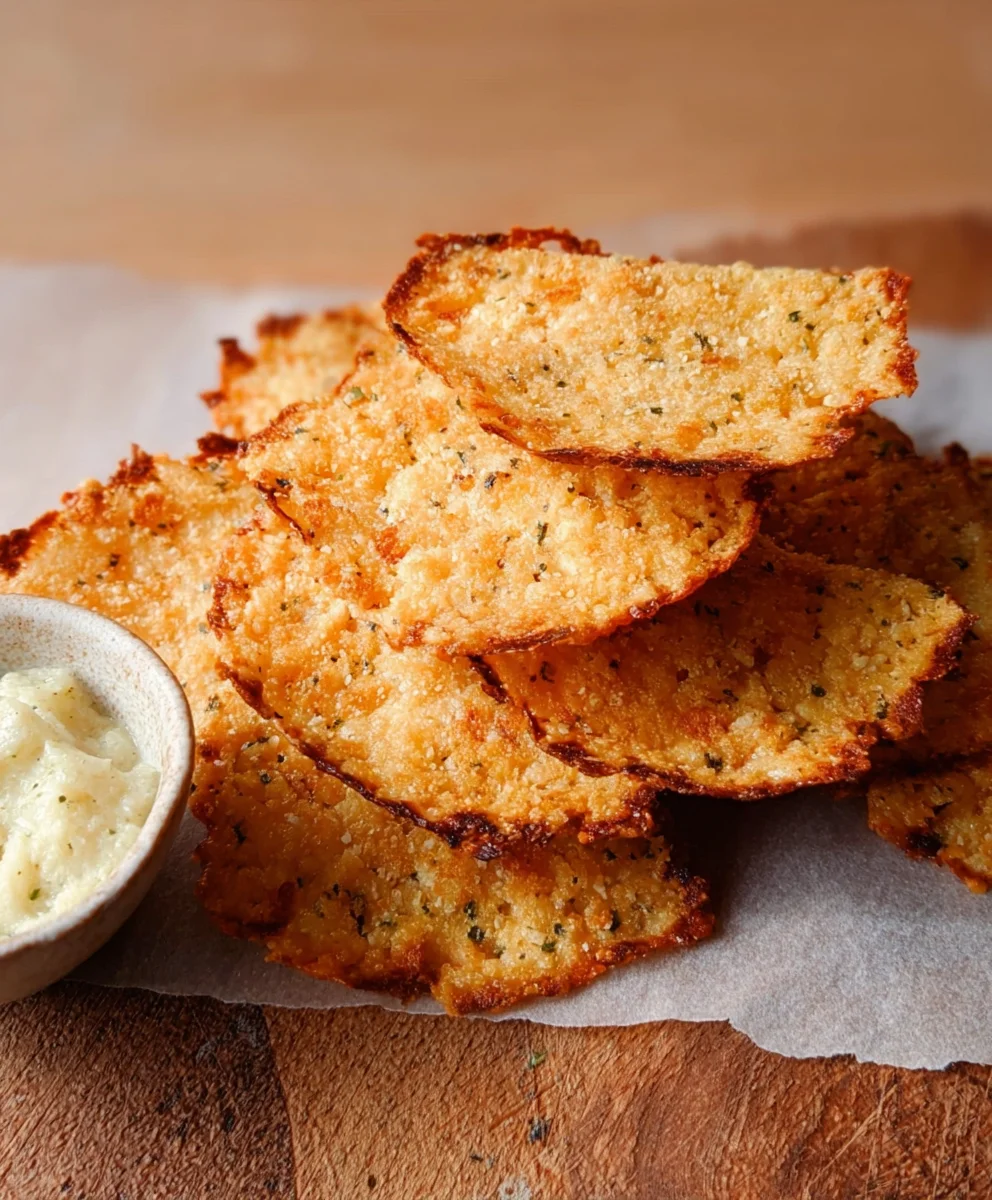
Cottage Cheese Chips are the crispy, savory revelation you’ve been waiting for, a delightful departure from the usual snack routine. If you’re seeking a guilt-free crunch that doesn’t compromise on flavor, look no further. These aren’t just any chips; they’re a testament to how humble ingredients can transform into something truly extraordinary. People adore these for so many reasons – their satisfying texture, their versatility, and the incredible feeling of making a wholesome snack from scratch that’s packed with protein. What makes Cottage Cheese Chips so special is their ingenious simplicity. You’ll be amazed at how a few basic components, baked to golden perfection, can create such an addictive treat. They’re the perfect canvas for your favorite seasonings, making each batch a unique culinary adventure. Get ready to discover your new favorite snack obsession!
Ingredients:
- 1 cup (240g) full-fat cottage cheese
- 1 large egg
- 1/4 cup (30g) grated Parmesan cheese
- 1/4 cup (30g) almond flour
- 1/4 teaspoon garlic powder
- 1/4 teaspoon onion powder
- 1/8 teaspoon smoked paprika
- Pinch of salt
- Pinch of black pepper
Getting Started: The Base for Your Cottage Cheese Chips
The foundation of these delightful cottage cheese chips lies in achieving the right consistency. We want a smooth, pliable dough that bakes up into crispy, satisfying morsels. To begin extract, place your full-fat cottage cheese into a food processor or a high-powered blender. Full-fat is crucial here, as it provides the necessary fat content for a richer flavor and better texture that will hold together well. If you only have low-fat or fat-free cottage cheese, you might find the chips don’t bind as effectively. Process the cottage cheese until it’s as smooth as possible, aiming for a creamy, lump-free consistency. This step is key to ensuring your chips don’t have any noticeable curds. You might need to scrape down the sides of the food processor a few times to make sure everything is incorporated and blended evenly.
Combining the Flavors: Building the Dough
Once your cottage cheese is beautifully smooth, it’s time to add the other wet ingredients. Crack in your large egg and give it another quick pulse in the food processor to combine it thoroughly with the cottage cheese. The egg acts as a binder, holding all the ingredients together and contributing to the crispiness during baking. Now, let’s introduce the dry components that will give our chips flavor and structure. Add the grated Parmesan cheese, almond flour, garlic powder, onion powder, smoked paprika, salt, and black pepper to the food processor. If you don’t have almond flour, you can try using coconut flour, but use a slightly smaller amount as it’s more absorbent – perhaps start with 2 tablespoons and adjust if the dough seems too wet. Grated Parmesan cheese not only adds a salty, nutty flavor but also helps with crisping. The spices are where you can really play and personalize your chips; feel free to adjust them to your liking or add other herbs like dried chives or a pinch of cayenne for a bit of heat. Pulse all these ingredients together until a cohesive dough forms. It should be thick and slightly sticky, but manageable. Don’t over-process at this stage; we just want everything to be well combined.
Shaping Your Crispy Creations: Getting Ready to Bake
Now comes the fun part: shaping your cottage cheese chips! Line a baking sheet with parchment paper. This is essential to prevent the chips from sticking to the baking sheet, ensuring they lift off cleanly after baking and maintain their crispiness. Lightly flour a clean surface or a piece of parchment paper with a little extra almond flour. Turn out the dough onto the floured surface. You can either gently knead the dough a few times to ensure it’s uniform, or you can skip this and go straight to rolling. Roll out the dough using a rolling pin to your desired thickness. For extra crispy chips, aim for a thinner dough, around 1/8 inch thick. If you prefer a chewier chip, roll it slightly thicker, perhaps 1/4 inch. The key is consistency in thickness so that all your chips bake evenly. Once rolled out, use a knife or a pizza cutter to cut the dough into your desired chip shapes. Squares, rectangles, or even fun cookie cutter shapes work perfectly. You can also simply break off small pieces and flatten them by hand if you prefer a more rustic look. Ensure the pieces aren’t too large, as smaller chips tend to get crispier.
The Magic of Baking: Achieving Perfect Crispness
Preheat your oven to 350°F (175°C). This moderate temperature allows the chips to dry out and crisp up without burning too quickly. Carefully transfer the cut dough pieces onto the prepared baking sheet, making sure there’s a little space between each chip. They won’t spread much, but a little breathing room helps with even cooking. Place the baking sheet in the preheated oven. Now, for the crucial part of achieving that perfect crisp: the baking time. Bake for approximately 15-20 minutes. However, this is where you’ll need to keep a close eye on them, as ovens can vary. After about 12-15 minutes, start checking them. They should start to turn golden brown around the edges. If you notice some chips browning faster than others, you can rotate the baking sheet or even carefully remove the more done chips to a cooling rack while the others finish. The goal is a beautiful golden-brown color and a texture that feels dry and firm to the touch.
Cooling and Enjoying: The Final Transformation
Once your cottage cheese chips have reached that perfect golden-brown crispness, remove the baking sheet from the oven. The chips will continue to crisp up as they cool. Let them cool on the baking sheet for about 5-10 minutes. This allows them to firm up before you attempt to move them. After this initial cooling period, carefully transfer the cottage cheese chips to a wire cooling rack. This is vital for achieving maximum crispness, as it allows air to circulate all around the chips, preventing any steam from accumulating and making them soggy. Let them cool completely on the wire rack. Once completely cool, they should be wonderfully crispy and ready to be devoured. Store any leftover cottage cheese chips in an airtight container at room temperature for up to 3-4 days. They are best enjoyed within the first couple of days to maintain their optimal crunch.

Conclusion:
Congratulations on mastering the art of making delicious Cottage Cheese Chips! You’ve now unlocked a fantastic way to create a crispy, savory snack that’s surprisingly simple to prepare. These Cottage Cheese Chips are incredibly versatile, offering a satisfying crunch without the guilt of traditional fried snacks. I hope you’ve enjoyed the process and are excited to dive into your homemade batch. Don’t be afraid to experiment and make them your own!
For serving, these Cottage Cheese Chips are wonderful on their own, but they truly shine when paired with your favorite dips. Think classic guacamole, a zesty salsa, or even a creamy ranch. They also make an excellent addition to salads, providing a delightful textural contrast. If you’re feeling adventurous, try crum extractbling them over soups for an added crunch.
The beauty of this recipe lies in its adaptability. Feel free to explore different seasoning combinations. Smoked paprika, garlic powder, onion powder, or even a touch of chili powder can transform your Cottage Cheese Chips into a whole new flavor experience. For a sweeter twist, though less common, you could experiment with a hint of cinnamon and a drizzle of honey after baking, though the savory route is where they truly excel.
Remember, the key to perfectly crispy Cottage Cheese Chips is ensuring they are baked until golden brown and firm. Don’t rush the process! Enjoy sharing these with friends and family, or savor them yourself as a well-deserved treat.
Frequently Asked Questions:
Can I make Cottage Cheese Chips ahead of time?
Yes, absolutely! Once cooled completely, store your Cottage Cheese Chips in an airtight container at room temperature. They should stay crisp for up to 3-4 days. If they lose a bit of crispness, you can briefly re-bake them in a low oven (around 200°F or 95°C) for a few minutes to revive them.
What kind of cottage cheese should I use?
You can use any kind of cottage cheese you prefer – full-fat, low-fat, or fat-free. Full-fat cottage cheese will likely yield a slightly richer flavor and texture. The most important thing is to ensure it’s well-drained to remove excess liquid, which helps in achieving that desired crispness.
Are Cottage Cheese Chips healthy?
Compared to many processed snacks, Cottage Cheese Chips are a healthier option. They are a good source of protein from the cottage cheese and are baked, not fried, significantly reducing the fat content. The nutritional value will depend on the type of cottage cheese you use and any added seasonings.
Crispy Cottage Cheese Chips
An easy and healthy snack made with cottage cheese, Parmesan, and almond flour, baked to a perfect crisp.
Ingredients
-
1 cup (240g) full-fat cottage cheese
-
1 large egg
-
1/4 cup (30g) grated Parmesan cheese
-
1/4 cup (30g) almond flour
-
1/4 teaspoon garlic powder
-
1/4 teaspoon onion powder
-
1/8 teaspoon smoked paprika
-
Pinch of salt
-
Pinch of black pepper
Instructions
-
Step 1
Place full-fat cottage cheese into a food processor and process until smooth and lump-free. -
Step 2
Add the egg and pulse to combine. Then, add grated Parmesan cheese, almond flour, garlic powder, onion powder, smoked paprika, salt, and black pepper. Pulse until a cohesive, thick, and slightly sticky dough forms. -
Step 3
Line a baking sheet with parchment paper. Lightly flour a clean surface or parchment paper with almond flour, turn out the dough, and roll it out to about 1/8 inch thickness for extra crispy chips. Cut the dough into desired chip shapes. -
Step 4
Preheat oven to 350°F (175°C). Arrange the cut dough pieces on the prepared baking sheet, ensuring space between them. -
Step 5
Bake for 15-20 minutes, or until golden brown around the edges and firm to the touch. Keep a close eye on them during the last few minutes as ovens vary. -
Step 6
Let the chips cool on the baking sheet for 5-10 minutes before transferring them to a wire cooling rack to cool completely. Store in an airtight container at room temperature for up to 3-4 days.
Important Information
Nutrition Facts (Per Serving)
It is important to consider this information as approximate and not to use it as definitive health advice.
Allergy Information
Please check ingredients for potential allergens and consult a health professional if in doubt.