Frozen Candy Grapes Jell-O Recipe – Easy Treat
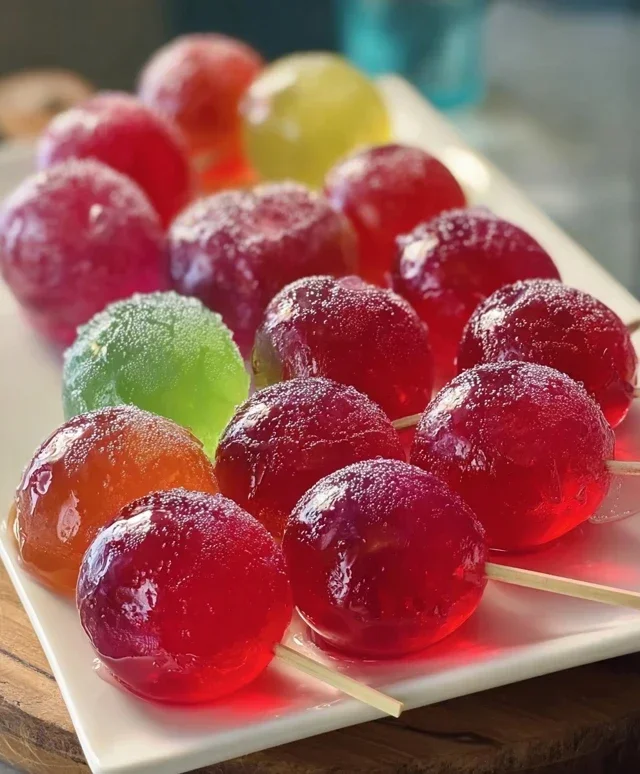
Frozen Candy Grapes with Jell-O are an absolute game-changer when it comes to simple yet spectacular treats. Have you ever craved a dessert that’s both incredibly refreshing and delightfully fun? Well, prepare to have your mind blown, because these frozen delights deliver on all fronts! We’re talking about juicy grapes transformed into bite-sized bursts of sweetness and fruity flavor, all encased in a vibrant, jiggly Jell-O shell. It’s no wonder why everyone’s buzzing about Frozen Candy Grapes with Jell-O; they’re ridiculously easy to make, making them the perfect activity for a hot afternoon or a delightful surprise for any gathering. What truly sets these apart is the magical combination of textures: the crisp pop of the frozen grape, the slight chew of the Jell-O, and the intense fruity sweetness that just melts in your mouth. Get ready to experience pure joy in every single bite of these unforgettable Frozen Candy Grapes with Jell-O!
Ingredients:
Crafting Your Own Frozen Candy Grapes with Jell-O
Are you looking for a fun, vibrant, and surprisingly delicious treat that will transport you back to childhood, or perhaps create a whole new kind of sweet and tangy sensation? Look no further than these Frozen Candy Grapes with Jell-O! This recipe takes the humble grape and transforms it into a dazzling, flavor-bursting experience that’s perfect for parties, a unique dessert, or just a fun afternoon snack. The magic lies in the way the Jell-O coating hardens into a delightful candy-like shell, with the option to add a touch of spice for an extra dimension of flavor.
The beauty of this recipe is its simplicity and the sheer visual appeal. Imagin extracte a platter filled with jewel-toned grapes, each one a tiny explosion of fruit flavor, ready to be popped into your mouth. The cold, crisp exterior gives way to the juicy sweetness of the grape, creating a truly delightful textural contrast. And the best part? You can customize the flavors and colors to match any occasion or theme. Whether you’re aiming for a rainbow of delights or a specific color scheme, the possibilities are endless with the variety of Jell-O flavors available.
Let’s get started on creating these delightful frozen gems. The process is straightforward, requiring minimal cooking and maximum fun. We’ll be focusing on preparing the grapes, creating our Jell-O coatings, and then artfully combining them to achieve that signature candy-like shell. Don’t be afraid to get creative with your flavor pairings and even your presentation.
Preparing the Grapes
The first and most crucial step is to prepare your grapes. You’ll want to select about a pound of fresh grapes. Green, red, or a mix of both work wonderfully. Ensure they are firm and free of any blemishes. Thoroughly wash your grapes under cool running water. This is important to remove any residual pesticides or dirt. After washing, you’ll need to gently pat them completely dry with paper towels or a clean kitchen towel. This step is absolutely vital. Any moisture remaining on the grapes will prevent the Jell-O from adhering properly, leading to a less-than-perfect coating. Once they are squeaky clean and thoroughly dry, you’re ready for the next stage.
Setting Up for Success
Before we dive into the Jell-O making, it’s a good idea to set up your workspace. Line baking sheets with parchment paper or wax paper. This will prevent the finished grapes from sticking to the trays as they freeze. Have your toothpicks readily available. You’ll be inserting a toothpick into the stem end of each grape, making it easier to dip them into the Jell-O and to handle them as they freeze. Prepare small bowls or cups for each of your Jell-O flavors. This allows for easy dipping and keeps your flavors separate.
Creating the Candy Coatings
Now for the fun part: the Jell-O! For each box of Jell-O, you will prepare it with less water than the package directions typically call for. This will result in a thicker, more concentrated Jell-O that will harden into a delightful, almost candy-like shell. In a heatproof bowl, empty one box of Jell-O powder. You will add only 1/4 cup of boiling water to each packet of Jell-O. Stir this mixture vigorously for about two minutes, or until the Jell-O powder is completely dissolved. It’s important to ensure no granules remain. If you find it difficult to dissolve completely with just 1/4 cup, you can add another tablespoon of boiling water, but be careful not to add too much, as this will make the coating too thin. Once dissolved, you’ll let this mixture cool slightly, about 5-10 minutes, until it’s warm but not hot to the touch. This is the perfect consistency for dipping. Repeat this process for each Jell-O flavor you wish to use, ensuring you have separate bowls for each.
The Dipping and Freezing Process
This is where the transformation truly happens. Take a toothpick and gently insert it into the stem end of a dried grape. Dip the grape into your prepared Jell-O mixture, swirling it around to coat the entire surface. You want a nice, even layer. If you want a thicker coating, you can dip the grape a second time, but allow the first coat to set slightly in the freezer for about 15-20 minutes before the second dip. Once coated, carefully place the grape on your prepared baking sheet, ensuring it’s not touching any other grapes. Repeat this process with all your grapes, working with one Jell-O flavor at a time. As you complete each tray, place it in the freezer. You’ll want to freeze the grapes for at least 2-3 hours, or until the Jell-O coating is firm and frozen solid. For the best texture and to ensure they are fully set, I recommend freezing them overnight.
Adding an Optional Spicy Kick
For those who enjoy a little heat, now is the time to add a flavor dimension. Once the Jell-O coating has started to firm up, but before it’s completely frozen solid (about an hour into the freezing process), you can lightly sprinkle the grapes with Tajín seasoning or chili powder. This will adhere to the slightly tacky Jell-O surface and add a delightful sweet-and-spicy contrast to the fruity grape. Be mindful not to overdo it, as a little goes a long way. This step is entirely optional, but I highly recommend it for a truly unique and addictive treat.
Serving and Enjoying
Once your Frozen Candy Grapes with Jell-O are completely frozen and solid, they are ready to be enjoyed! Carefully remove them from the baking sheet by pulling gently on the toothpicks. Serve them immediately, as they will start to soften as they come to room temperature. You can arrange them on a platter for a beautiful presentation, or simply serve them in small bowls. These are best enjoyed shortly after they are made, as the Jell-O coating can become sticky if left out for too long. They are a fantastic conversation starter and a guaranteed hit with both kids and adults alike. Enjoy this delightful frozen treat that’s bursting with flavor and color!
Conclusion:
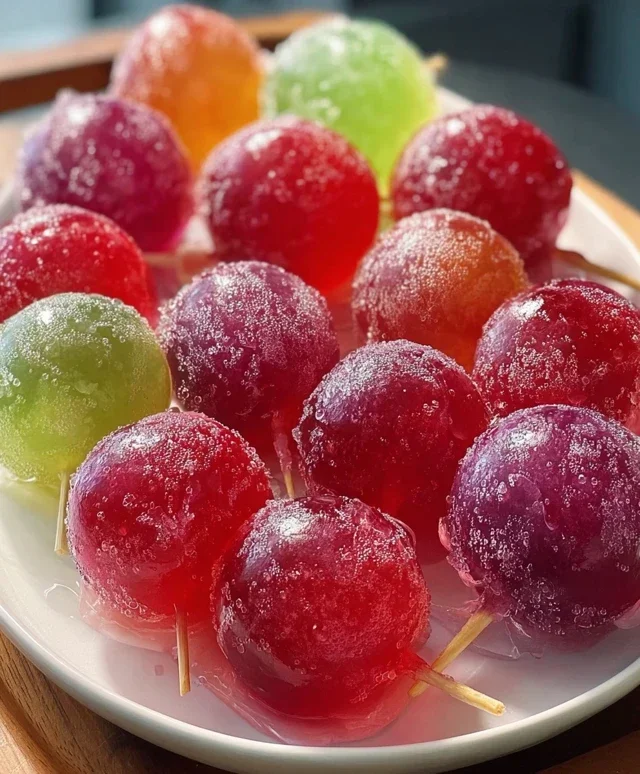
There you have it – a simple yet incredibly satisfying recipe for Frozen Candy Grapes with Jell-O! This delightful treat is fantastic because it transforms ordinary grapes into a vibrant, flavor-bursting sensation that’s both refreshing and fun to eat. The combination of the naturally sweet grapes with the fruity tang of Jell-O, all chilled to a perfect frosty crispness, makes these a hit for all ages. They’re wonderfully versatile, perfect as a quick afternoon snack, a playful dessert, or even a unique addition to a party platter. I encourage you to give this recipe a try – it’s incredibly easy and the results are surprisingly gourmet for such minimal effort!
For serving, consider presenting these dazzling frozen candy grapes in a fun bowl, or perhaps individually on small skewers for an elegant touch. They pair beautifully with a glass of sparkling water or a light lemonade. Don’t be afraid to experiment with different Jell-O flavors to discover your favorite combinations. Think about mixing berry flavors with green grapes, or lime with red grapes for a striking visual and taste contrast. This is one of those recipes that’s so adaptable, you can truly make it your own.
Frequently Asked Questions:
Can I use other fruits besides grapes?
While this recipe is specifically designed for grapes due to their size and skin texture, you could experiment with other small fruits like blueberries or small chunks of melon. However, the texture and the way the Jell-O coats them might be different. Grapes are definitely the star for a reason!
How long do these Frozen Candy Grapes with Jell-O last in the freezer?
These treats are best enjoyed within a week for optimal texture and flavor. After that, they can become a bit too icy. Make sure to store them in an airtight container to prevent freezer burn.
Is there a way to make them less sweet?
If you find the Jell-O a bit too sweet for your liking, you can try using sugar-free Jell-O options. You can also opt for less sweet grape varieties. The natural sweetness of the grapes should still shine through.
Frozen Candy Grapes with Jell-O
A fun and colorful frozen treat made with candy-sweetened grapes coated in vibrant Jell-O and a spicy kick.
Ingredients
-
1 pound grapes (green, red, or mixed)
-
1 cup water
-
Toothpicks
-
1 box raspberry Jell-O
-
1 box berry blue Jell-O
-
1 box orange Jell-O
-
1 box lime Jell-O
-
1 box lemon Jell-O
-
1 box grape Jell-O
-
Tajín seasoning
-
Chili powder
Instructions
-
Step 1
Wash and thoroughly dry the grapes. Remove them from the stems. -
Step 2
Insert a toothpick into the stem end of each grape. -
Step 3
Prepare each flavor of Jell-O according to package directions, using 1 cup of boiling water and 1 cup of cold water for each box. Let them cool slightly to a syrupy consistency. -
Step 4
Dip each grape into a chosen Jell-O mixture, coating it completely. Allow excess to drip off. -
Step 5
Place the coated grapes on a baking sheet lined with parchment paper. Sprinkle with Tajín seasoning and chili powder to taste. -
Step 6
Freeze the grapes for at least 30 minutes, or until firm.
Important Information
Nutrition Facts (Per Serving)
It is important to consider this information as approximate and not to use it as definitive health advice.
Allergy Information
Please check ingredients for potential allergens and consult a health professional if in doubt.