Easy Dutch Oven No Knead Crusty Bread Recipe
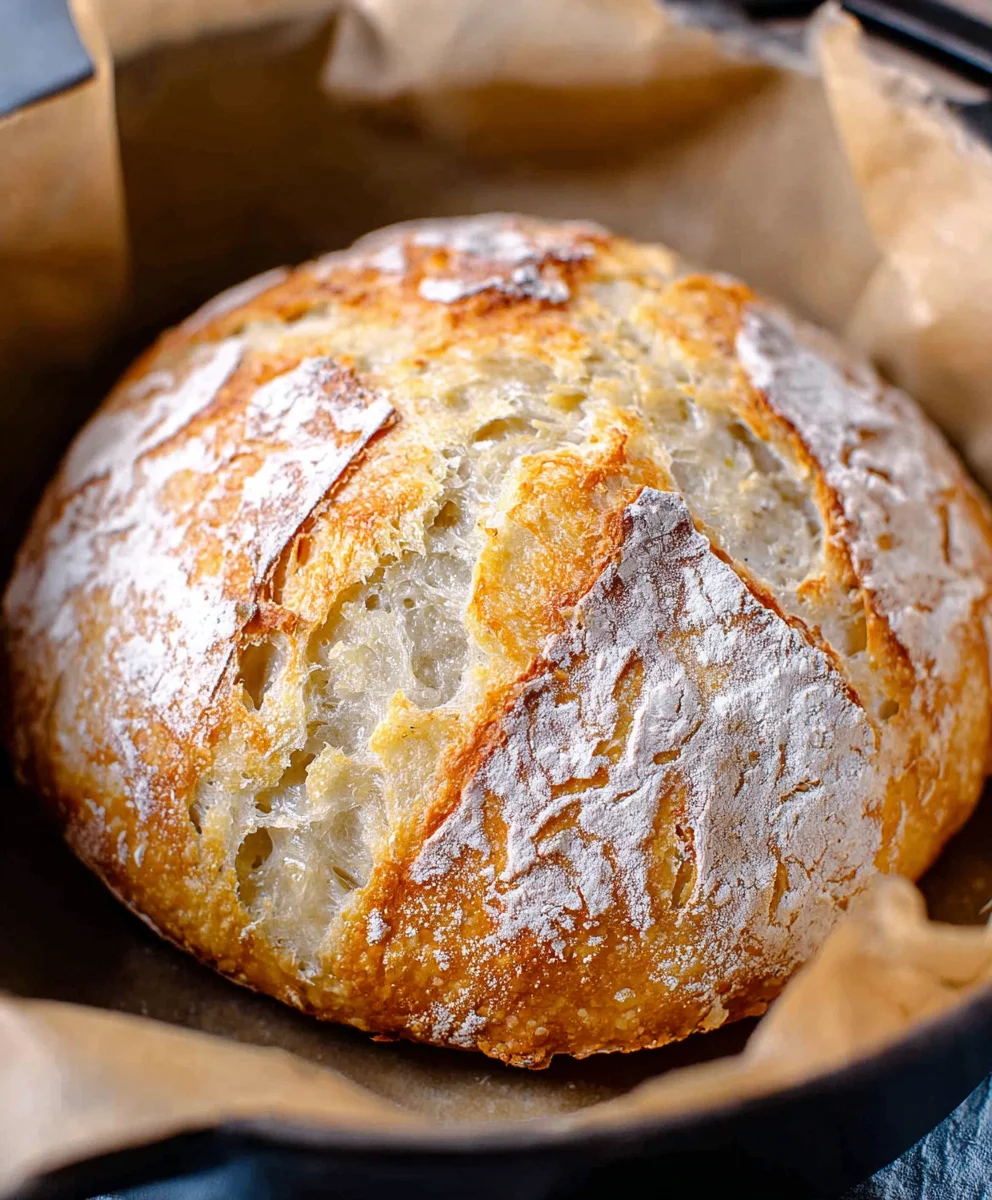
Dutch Oven No Knead Crusty Bread is more than just a recipe; it’s an invitation to experience the pure joy of baking, even if you think you don’t have a baker’s bone in your body. Imagin extracte the aroma filling your kitchen, the satisfying crackle as you slice into a golden-brown crust, and the pillowy, airy interior that melts in your mouth. This isn’t the bread you find at the grocery store; this is bread with soul, crafted with minimal effort and maximum reward. People adore this Dutch oven no knead crusty bread because it demystifies the art of sourdough-like texture and flavor, delivering professional-grade results with everyday ingredients and a surprisingly hands-off approach. The magic lies in the Dutch oven, which traps steam, creating that coveted crispy exterior and a wonderfully chewy crum extractb that’s simply irresistible. Get ready to impress yourself and everyone you share it with.
Ingredients:
- 1 ½ cups warm water (about 100 degrees F)
- 1 packet yeast (active dry, instant, or quick rise – 2.25 teaspoons)
- 1 ½ teaspoons fine grain salt
- 3 ¼ cups all-purpose flour
Mixing the Dough
We’re going to start by activating our yeast. In a large bowl, combine the 1 ½ cups of warm water with your packet of yeast. The water should feel comfortably warm to the touch, not hot – think of a baby’s bathwater. If it’s too hot, it can kill the yeast, and if it’s too cold, it won’t activate properly. Give it a gentle stir and let it sit for about 5 to 10 minutes. You’ll know it’s ready when it gets foamy and bubbly on the surface, which is a sign that the yeast is alive and eager to work its magic.
Once your yeast mixture is looking lively, it’s time to add the remaining dry ingredients. To the foamy yeast mixture, add the 1 ½ teaspoons of fine grain salt and the 3 ¼ cups of all-purpose flour. Now, here’s where the “no knead” part comes in! You don’t need to get your hands in there and do any fancy dough work. We’re going to use a sturdy spoon or a spatula to mix everything together until it’s just combined. The dough will look shaggy and sticky, and that’s perfectly okay. Don’t be tempted to add more flour at this stage, even if it looks a bit messy. The stickiness is actually important for developing the gluten structure needed for a crusty loaf without kneading.
First Rise: Letting the Magic Happen
After you’ve mixed the dough until there are no dry pockets of flour visible, cover the bowl tightly. You can use plastic wrap, a clean kitchen towel, or even a loose-fitting lid. The key is to create a slightly humid environment for the dough to rest and rise. Place the covered bowl in a warm spot in your kitchen. This could be on top of your refrigerator, near a pilot light on your stove (if you have one and it’s safe!), or simply on your counter if your kitchen is generally warm. Let the dough rise for at least 8 hours, or preferably, overnight. This long, slow fermentation is what develops the incredible flavor and texture of this Dutch Oven No Knead Crusty Bread. During this time, the yeast will work its way through the flour, creating air pockets and a complex flavor profile.
Shaping and Second Rise
The next morning, or after your 8-hour rest, you’ll notice that the dough has doubled in size and is wonderfully puffy and airy. Now, it’s time to gently shape our loaf. Lightly flour a clean work surface. Be generous with the flour here to prevent sticking. Carefully scrape the dough out of the bowl onto the floured surface. Try to handle it as little as possible to maintain those precious air bubbles. Fold the dough over on itself a couple of times, like you’re folding a letter. This creates a bit of surface tension that will help the bread hold its shape as it bakes. Gently form it into a round or oval loaf, tucking any loose edges underneath.
Once shaped, you’ll need a place for the loaf to have its second, much shorter, rise. A piece of parchment paper is ideal for this. Place your shaped dough onto the parchment paper. If you have a proofing basket (a banneton), you can lightly flour it and place the dough seam-side down into the basket. Otherwise, the parchment paper will work perfectly fine. Cover the dough loosely with plastic wrap or a clean kitchen towel and let it rest for another 30 minutes to an hour while you preheat your oven and Dutch oven. This second rise allows the dough to relax and puff up slightly before hitting the intense heat of the oven.
Baking to Perfection
This is where the magic of the Dutch oven truly shines for our Dutch Oven No Knead Crusty Bread. About 30 minutes before your second rise is complete, place your empty Dutch oven (with its lid on!) into your oven and preheat it to 450 degrees Fahrenheit (230 degrees Celsius). It’s crucial that the Dutch oven is thoroughly heated, as this intense heat is what will create that amazing crust. Once the oven and Dutch oven are fully preheated, carefully remove the hot Dutch oven from the oven. Take off the lid and using the parchment paper as a sling, carefully lower the dough into the hot Dutch oven. Be very careful, as everything is extremely hot!
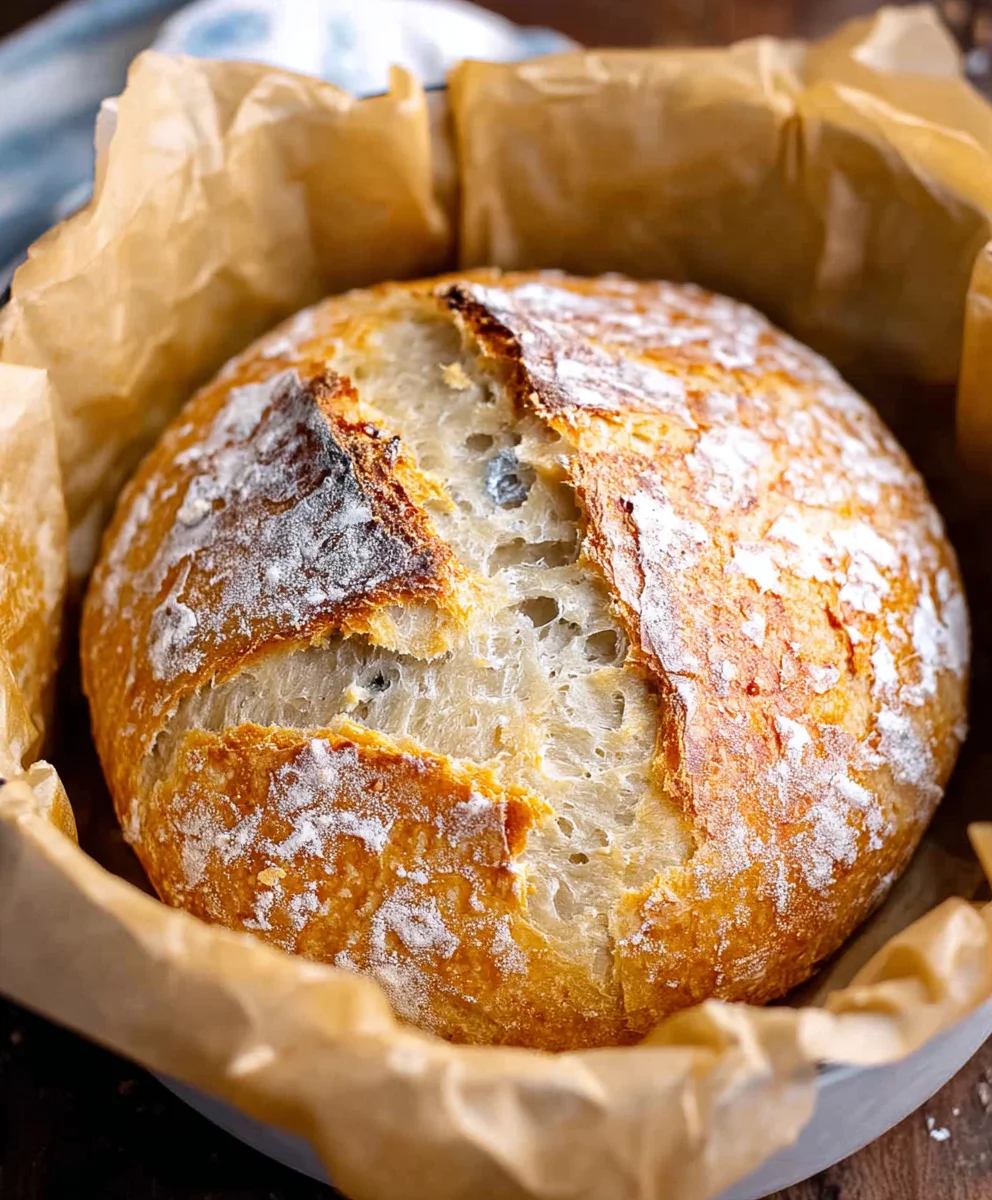
Place the lid back on the Dutch oven and carefully return it to the oven. Bake the bread, covered, for 30 minutes. This steaming environment created by the lid is essential for achieving a thin, crispy crust. After 30 minutes, carefully remove the lid. You’ll see a pnon-alcoholic ale, puffy loaf. Continue to bake, uncovered, for another 15 to 20 minutes, or until the crust is a deep golden brown and sounds hollow when tapped on the bottom. The exact baking time will vary depending on your oven, so keep an eye on it. Once baked, carefully remove the bread from the Dutch oven and place it on a wire rack to cool completely. Resist the urge to slice into it immediately; letting it cool allows the internal structure to set, ensuring a better texture.
Conclusion:
You’ve done it! You’ve successfully baked your very own delicious Dutch Oven No Knead Crusty Bread. This recipe demystifies the art of artisanal bread-making, proving that incredible crusty loaves are achievable for everyone, even without a lot of kneading. The beauty of this bread lies in its simplicity and the magical transformation that happens within your Dutch oven. The result is a loaf with a wonderfully chewy interior and that signature shatteringly crisp crust that’s perfect for dipping, toasting, or simply enjoying on its own. Don’t be afraid to experiment with the variations suggested; this recipe is a fantastic foundation for all sorts of bread adventures.
Serve your Dutch Oven No Knead Crusty Bread warm with butter, alongside your favorite soup or stew, or as the base for an amazing sandwich. For a delightful twist, consider adding herbs like rosemary or thyme to the dough, or perhaps some grated cheese for a savory kick. Remember, practice makes perfect, so don’t be discouraged if your first loaf isn’t absolutely flawless. Each bake will bring you closer to mastering this wonderfully rewarding technique. Enjoy the process and savor every bite!
Frequently Asked Questions:
Q: Why does my Dutch Oven No Knead Crusty Bread sometimes have a pnon-alcoholic ale crust?
A: A pale crust can occur if your oven isn’t hot enough, or if you haven’t preheated your Dutch oven sufficiently. Ensure your oven is accurately calibrated and that the Dutch oven is screaming hot before adding the dough. Also, baking with the lid on for the initial phase is crucial for trapping steam, which helps develop a beautiful, golden-brown crust.
Q: Can I make this Dutch Oven No Knead Crusty Bread recipe with different types of flour?
A: Absolutely! While all-purpose flour is recommended for its balance, you can experiment with a blend. Substituting up to 20-30% of the all-purpose flour with whole wheat flour will yield a heartier bread with a slightly denser crum extractb. For a truly rustic loaf, you could even try a portion of rye flour, but be mindful that these flours absorb moisture differently, so you might need slight adjustments to the water content.
Easy Dutch Oven No Knead Crusty Bread
A simple and delicious recipe for homemade crusty bread using a Dutch oven, requiring no kneading.
Ingredients
-
1 ½ cups warm water (about 100 degrees F)
-
1 packet yeast (active dry, instant, or quick rise – 2.25 teaspoons)
-
1 ½ teaspoons fine grain salt
-
3 ¼ cups all-purpose flour
-
Extra flour for dusting
Instructions
-
Step 1
Activate yeast: Combine 1 ½ cups warm water with yeast in a large bowl. Let sit 5-10 minutes until foamy.
-
Step 2
Mix dough: Add salt and flour to the foamy yeast mixture. Stir with a spoon or spatula until just combined into a shaggy, sticky dough. Do not add more flour.
-
Step 3
First Rise: Cover the bowl tightly and let the dough rise in a warm spot for at least 8 hours, or preferably overnight.
-
Step 4
Shape loaf: Gently scrape dough onto a generously floured surface. Fold dough a couple of times and gently form into a round or oval loaf. Place on parchment paper or in a floured proofing basket.
-
Step 5
Second Rise: Cover loosely and let rest for 30-60 minutes while preheating the oven and Dutch oven.
-
Step 6
Preheat: Place empty Dutch oven with lid on into oven preheated to 450°F (230°C) for at least 30 minutes.
-
Step 7
Bake covered: Carefully lower dough into hot Dutch oven using parchment paper. Cover with lid and bake for 30 minutes.
-
Step 8
Bake uncovered: Remove lid and bake for another 15-20 minutes until deep golden brown and sounds hollow when tapped.
-
Step 9
Cool: Remove bread from Dutch oven and cool completely on a wire rack before slicing.
Important Information
Nutrition Facts (Per Serving)
It is important to consider this information as approximate and not to use it as definitive health advice.
Allergy Information
Please check ingredients for potential allergens and consult a health professional if in doubt.
A: A pale crust can occur if your oven isn’t hot enough, or if you haven’t preheated your Dutch oven sufficiently. Ensure your oven is accurately calibrated and that the Dutch oven is screaming hot before adding the dough. Also, baking with the lid on for the initial phase is crucial for trapping steam, which helps develop a beautiful, golden-brown crust.
Q: Can I make this Dutch Oven No Knead Crusty Bread recipe with different types of flour?
A: Absolutely! While all-purpose flour is recommended for its balance, you can experiment with a blend. Substituting up to 20-30% of the all-purpose flour with whole wheat flour will yield a heartier bread with a slightly denser crum extractb. For a truly rustic loaf, you could even try a portion of rye flour, but be mindful that these flours absorb moisture differently, so you might need slight adjustments to the water content.
Easy Dutch Oven No Knead Crusty Bread
A simple and delicious recipe for homemade crusty bread using a Dutch oven, requiring no kneading.
Ingredients
-
1 ½ cups warm water (about 100 degrees F)
-
1 packet yeast (active dry, instant, or quick rise – 2.25 teaspoons)
-
1 ½ teaspoons fine grain salt
-
3 ¼ cups all-purpose flour
-
Extra flour for dusting
Instructions
-
Step 1
Activate yeast: Combine 1 ½ cups warm water with yeast in a large bowl. Let sit 5-10 minutes until foamy. -
Step 2
Mix dough: Add salt and flour to the foamy yeast mixture. Stir with a spoon or spatula until just combined into a shaggy, sticky dough. Do not add more flour. -
Step 3
First Rise: Cover the bowl tightly and let the dough rise in a warm spot for at least 8 hours, or preferably overnight. -
Step 4
Shape loaf: Gently scrape dough onto a generously floured surface. Fold dough a couple of times and gently form into a round or oval loaf. Place on parchment paper or in a floured proofing basket. -
Step 5
Second Rise: Cover loosely and let rest for 30-60 minutes while preheating the oven and Dutch oven. -
Step 6
Preheat: Place empty Dutch oven with lid on into oven preheated to 450°F (230°C) for at least 30 minutes. -
Step 7
Bake covered: Carefully lower dough into hot Dutch oven using parchment paper. Cover with lid and bake for 30 minutes. -
Step 8
Bake uncovered: Remove lid and bake for another 15-20 minutes until deep golden brown and sounds hollow when tapped. -
Step 9
Cool: Remove bread from Dutch oven and cool completely on a wire rack before slicing.
Important Information
Nutrition Facts (Per Serving)
It is important to consider this information as approximate and not to use it as definitive health advice.
Allergy Information
Please check ingredients for potential allergens and consult a health professional if in doubt.