Easy Homemade Cereal Bars-Quick Snack Idea
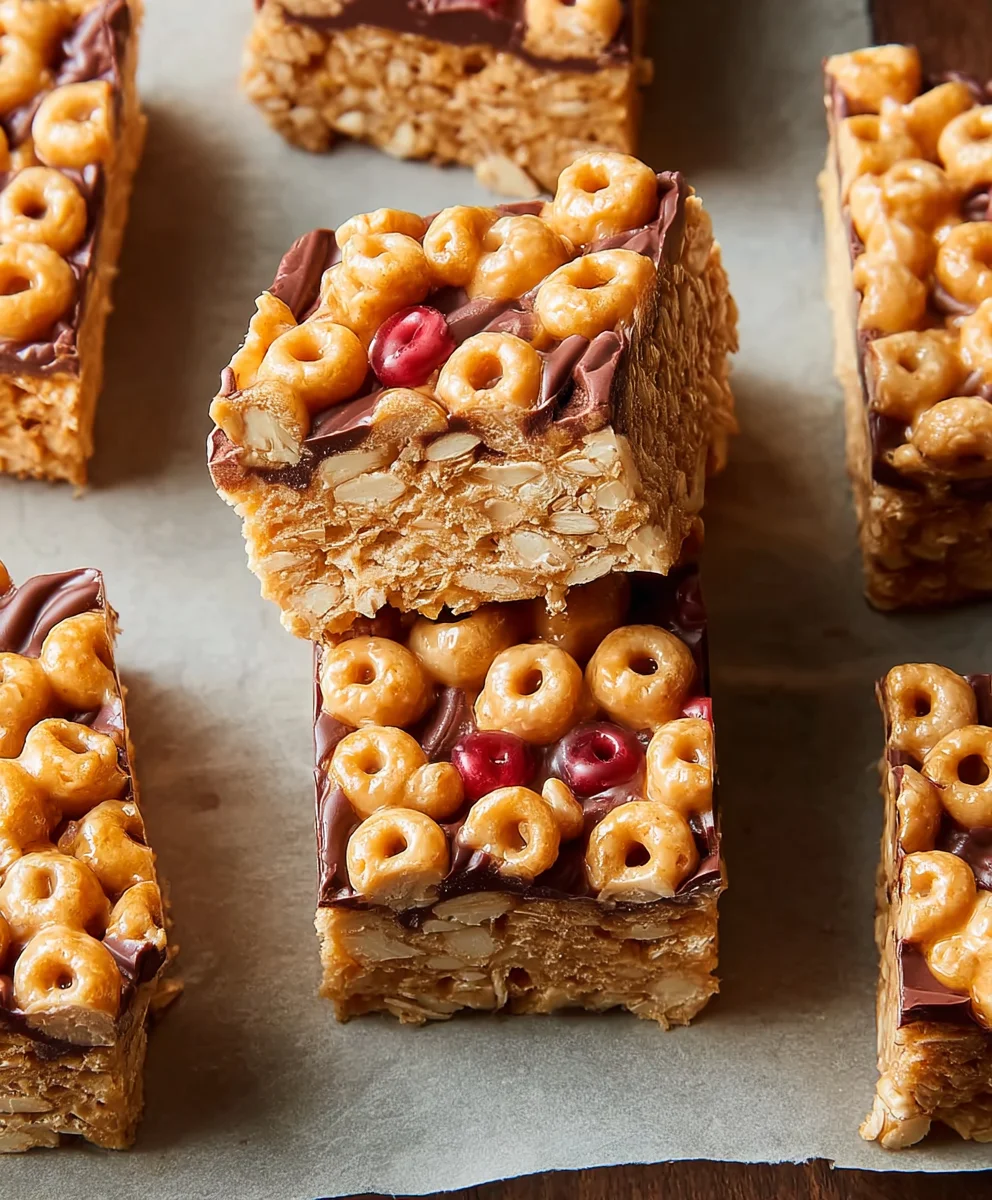
Cereal bars are more than just a quick snack; they’re a comforting whisper from childhood, a portable hug for your taste buds, and a surprisingly versatile canvas for deliciousness. Who doesn’t remember the sheer joy of unwrapping a sweet, chewy treat after school, or the satisfying crunch that signnon-alcoholic aled a moment of pure, unadulterated bliss? It’s that nostalgic connection, combined with their incredible convenience and customizable nature, that makes Cereal bars so universally loved. They’re perfect for busy mornings, afternoon pick-me-ups, or even as a guilt-free dessert. What truly sets this particular recipe apart is its masterful balance of textures and flavors. We’re not just talking about a basic, one-note bar; this recipe elevates the humble Cereal bar into something truly special, incorporating unexpected ingredients that create a symphony of sweet, salty, and chewy delights. Get ready to rediscover your love for this classic treat with a delightful twist!
Ingredients:
- 3 cups cereal of choice
- 2/3 cup peanut butter or nut butter of choice
- 1/2 cup agave, honey, or brown rice syrup
- 1/2 tsp salt (optional)
- 3 tbsp protein powder (optional)
Preparing Your No-Bake Cereal Bars
These no-bake cereal bars are a fantastic, customizable treat that requires minimal effort and delivers maximum satisfaction. They are perfect for a quick breakfast on the go, a post-workout refuel, or a healthier sweet indulgence. The beauty of this recipe lies in its simplicity and adaptability; you can truly make it your own by selecting your favorite cereal and nut butter.
Gathering Your Supplies
Before you begin extract, make sure you have a medium-sized mixing bowl, a spatula or sturdy spoon for mixing, and a baking dish (an 8×8 inch pan is ideal for a good thickness). You’ll also want some parchment paper or plastic wrap to line the dish, which will make removing and slicing the bars a breeze. Having all your ingredients measured out and ready to go will make the process smoother and more enjoyable.
Step-by-Step Instructions
1. Combine the Wet Ingredients
In your medium mixing bowl, add the 2/3 cup of your chosen peanut butter or nut butter. If your nut butter is on the firmer side, you might want to give it a quick stir in its jar first to ensure it’s smooth and easily pourable. Next, add the 1/2 cup of your sweetener. Whether you opt for agave for a vegan-friendly option, honey for its classic sweetness, or brown rice syrup for a slightly less sweet, more caramel-like flavor, it will work beautifully. If you’re using the optional 1/2 teaspoon of salt, now is the time to add it. Salt helps to balance the sweetness and enhance the overall flavor profile of the bars, especially if your nut butter is unsalted. Stir these wet ingredients together thoroughly until they are well combined and have a glossy, uniform consistency. This mixture will form the sticky base that holds all your cereal together.
2. Incorporate the Cereal and Optional Protein Powder
Once your wet ingredients are smoothly blended, it’s time to add the star of the show: the 3 cups of cereal of your choice. Think about the texture and flavor you desire. Crispy rice cereals will give you a lighter, crunchier bar, while puffed wheat or even a granola can provide a more substantial bite. Even a mix of cereals can be fun! Gently fold the cereal into the wet mixture. You want to coat every piece of cereal evenly without crushing it too much. Use your spatula to press the cereal into the peanut butter mixture, ensuring it all sticks together. If you’re adding the 3 tablespoons of protein powder for an extra nutritional boost, sprinkle it over the cereal and wet ingredients at this stage. It’s important to distribute it evenly to avoid clumps. Continue to mix until the protein powder is fully incorporated and no dry pockets remain. This step requires a bit of patience to ensure everything is bound together effectively.
3. Press the Mixture into the Baking Dish
Line your 8×8 inch baking dish with parchment paper or plastic wrap, leaving some overhang on the sides. This overhang will act as handles, making it incredibly easy to lift the entire block of cereal bars out of the dish once they’re set. Spoon the cereal mixture into the prepared baking dish. Now comes the crucial part: pressing the mixture down firmly and evenly. You want a compact layer so that your cereal bars hold their shape when cut. You can use the back of your spatula, or even a piece of parchment paper placed on top of the mixture to press it down with your hands or the bottom of a glass. Apply steady pressure to ensure there are no air pockets and that the bars will be dense and satisfying. The more compact you make the layer, the less likely they are to crum extractble.
4. Chill and Set the Bars
Once the mixture is pressed firmly and evenly into the baking dish, it’s time to let them set. Place the dish in the refrigerator for at least 1 hour. This chilling period is essential for the nut butter and sweetener to firm up, binding the cereal together into a solid, sliceable block. For even firmer bars, especially in warmer environments, you can leave them in the refrigerator for up to 2 hours. If you’re in a hurry, you can pop them in the freezer for about 20-30 minutes, but be careful not to freeze them solid, as this can make them difficult to cut. The goal is for the mixture to be firm enough to hold its shape when sliced.
5. Slice and Serve Your Cereal Bars
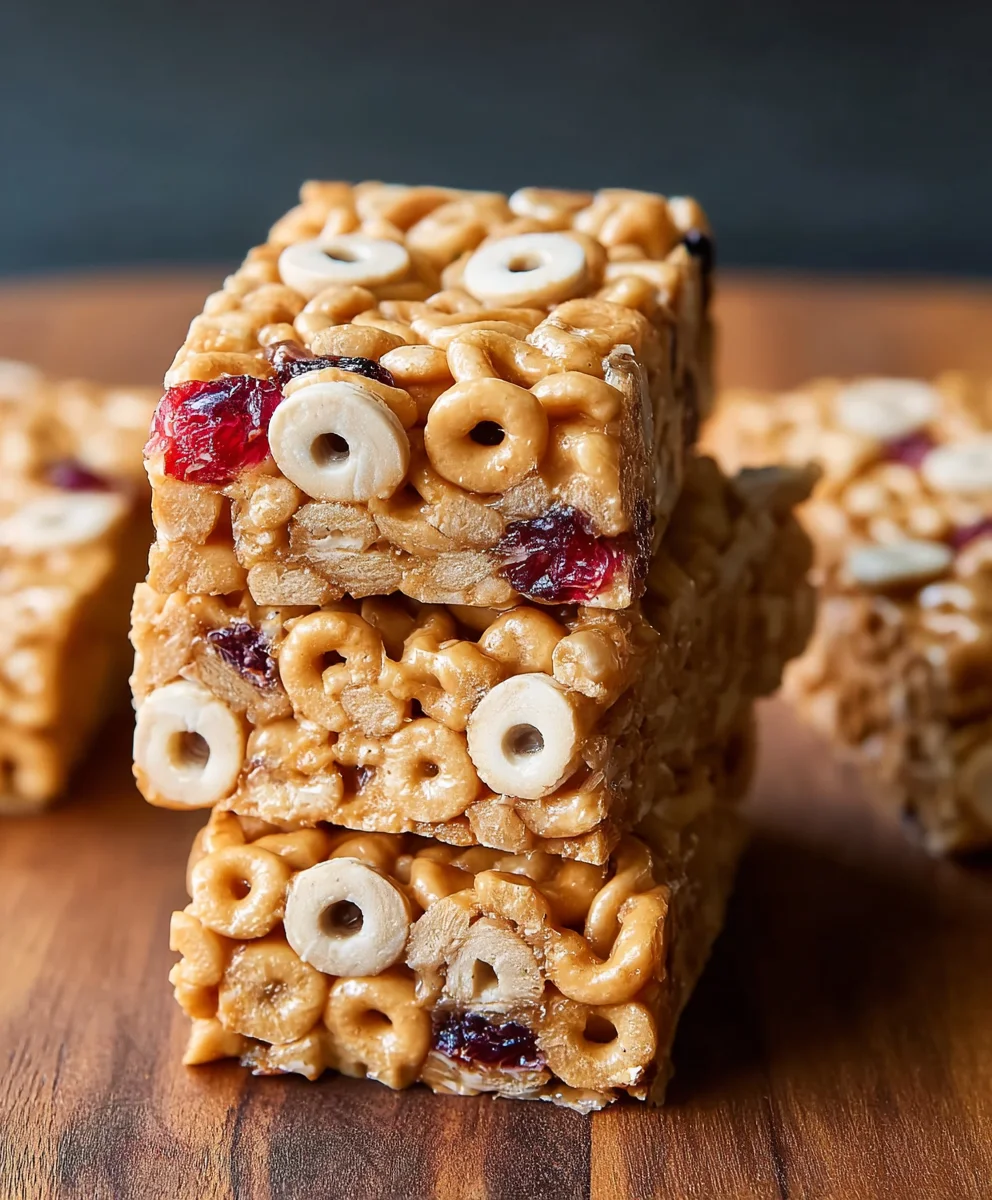
After the chilling period, carefully lift the entire block of cereal mixture out of the baking dish using the parchment paper overhangs. Place it on a clean cutting board. Using a sharp knife, cut the block into your desired bar sizes. Common sizes are 1 inch by 3 inches, or you can make them into smaller squares for snack bites. If the mixture feels a little sticky while cutting, you can dip your knife in a little water or lightly spray it with cooking spray. Arrange your freshly cut cereal bars on a plate and admire your handiwork! These bars are best stored in an airtight container in the refrigerator to maintain their firmness and freshness. They should stay delicious for up to a week. Enjoy!
Conclusion:
And there you have it – your very own batch of delicious homemade Cereal Bars! We’ve journeyed through creating these simple yet incredibly satisfying treats, perfect for a quick breakfast, a school lunchbox addition, or a guilt-free afternoon snack. The beauty of these Cereal Bars lies in their adaptability. Don’t hesitate to experiment with different types of cereals, nuts, seeds, or dried fruits to make them uniquely yours. Whether you enjoy them plain or elevate them with a drizzle of chocolate or a dollop of yogurt, these Cereal Bars are sure to become a staple in your kitchen. So go ahead, bake a batch, share them with loved ones, and savor the homemade goodness!
Frequently Asked Questions:
Q: How should I store my Cereal Bars?
A: To keep your Cereal Bars fresh, store them in an airtight container at room temperature for up to a week. If you live in a warmer climate, you might consider refrigerating them to prevent them from becoming too soft. For longer storage, you can individually wrap them in parchment paper and then place them in a freezer-safe bag or container for up to three months.
Q: Can I make these Cereal Bars healthier?
A: Absolutely! You can boost the nutritional value of your Cereal Bars by incorporating ingredients like chia seeds, flax seeds, or hemp seeds. Swapping out some of the sugar for pureed dates or applesauce can also reduce added sugar. Opting for whole-grain cereals with higher fiber content is another excellent way to enhance their health benefits.
Easy Homemade Cereal Bars
Quick, no-bake cereal bars perfect for a customizable snack, breakfast on the go, or post-workout refuel. Adaptable to your favorite cereals and nut butters.
Ingredients
-
3 cups cereal of choice
-
2/3 cup peanut butter or nut butter of choice
-
1/2 cup agave, honey, or brown rice syrup
-
1/2 tsp salt (optional)
-
3 tbsp protein powder (optional)
Instructions
-
Step 1
In a medium mixing bowl, combine the peanut butter or nut butter, agave, honey, or brown rice syrup, and optional salt. Stir until smooth and well combined. -
Step 2
Add the cereal of choice to the wet ingredients. If using, sprinkle in the protein powder. Gently fold everything together until the cereal is evenly coated and all ingredients are bound. -
Step 3
Line an 8×8 inch baking dish with parchment paper, leaving overhangs. Spoon the cereal mixture into the prepared dish. -
Step 4
Press the mixture firmly and evenly into the baking dish to create a compact layer. This ensures the bars will hold their shape. -
Step 5
Refrigerate the dish for at least 1 hour, or until the mixture is firm and set. For firmer bars, chill for up to 2 hours, or freeze for 20-30 minutes (do not freeze solid). -
Step 6
Using the parchment paper overhangs, lift the block of cereal mixture out of the dish and place it on a cutting board. Cut into desired bar sizes. Serve immediately or store in an airtight container in the refrigerator for up to a week.
Important Information
Nutrition Facts (Per Serving)
It is important to consider this information as approximate and not to use it as definitive health advice.
Allergy Information
Please check ingredients for potential allergens and consult a health professional if in doubt.