Easter Rice Krispie Treats- Easy Holiday Fun
Easter Rice Krispie Treats are more than just a simple nostalgic snack; they’re a vibrant celebration in every bite. There’s something undeniably magical about transforming humble puffed rice cereal, gooey marshmallows, and a touch of butter into a confection that screams spring and joy. What is it about these classic treats that capture our hearts year after year? Perhaps it’s the effortless assembly, allowing everyone from seasoned bakers to little helpers to join in the fun. Or maybe it’s the incredibly satisfying chewy texture and sweet, buttery flavor that instantly brings back cherished childhood memories. This year, we’re taking our beloved Easter Rice Krispie Treats to a whole new level, infusing them with festive colors and delightful spring-themed additions that make them the perfect centerpiece for your Easter brunch, a delightful addition to your Easter basket, or simply a sweet way to brighten any spring day.
Why You’ll Love This Recipe
This recipe is designed for maximum festive impact with minimal fuss. We’re talking about transforming your classic Rice Krispie Treats into edible works of art that are almost too pretty to eat (almost!). The secret to their special charm lies in the simple yet effective techniques that elevate them beyond the everyday. Get ready for smiles all around!
A Touch of Spring Magic
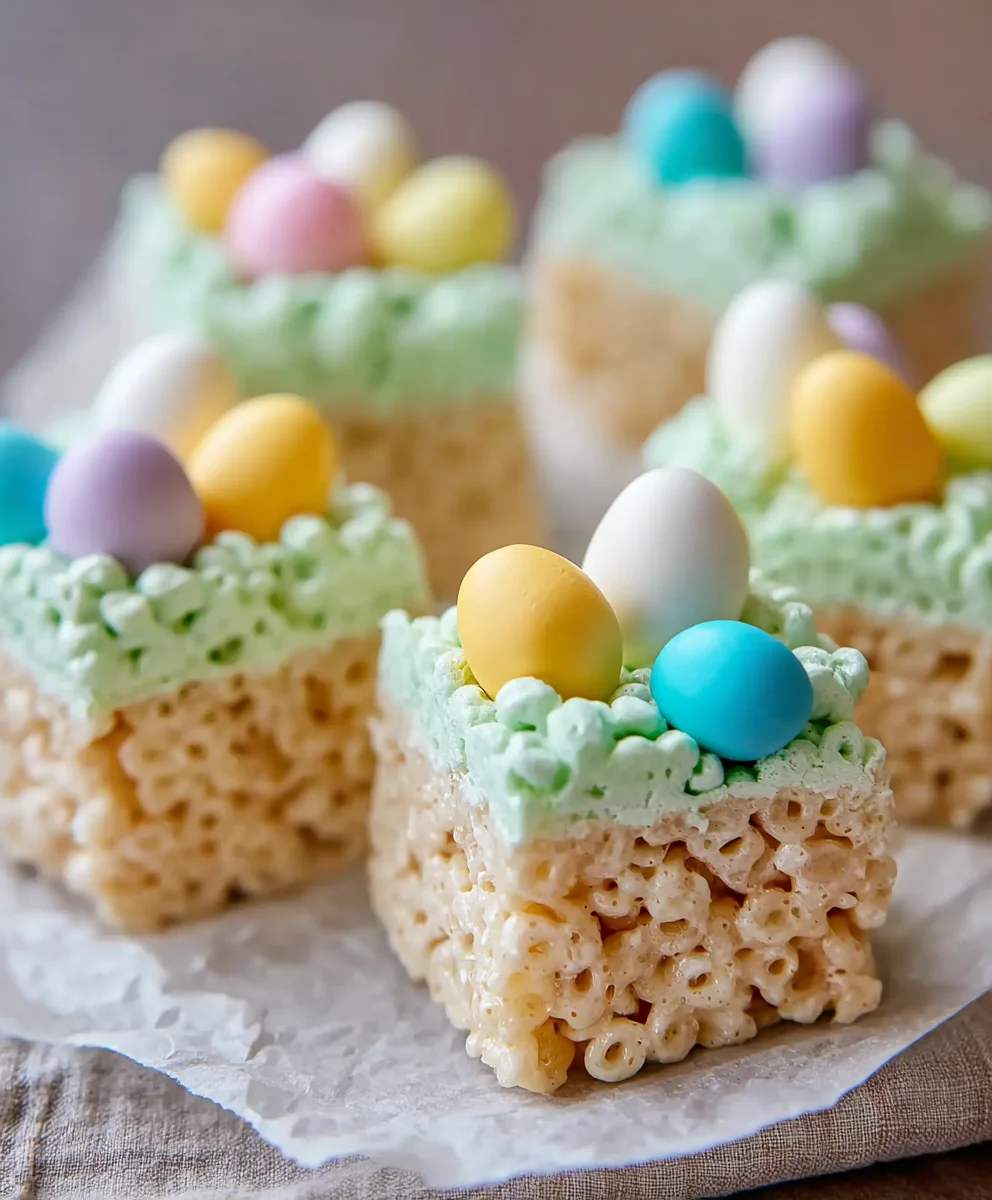
Imagin extracte vibrant pastel colors swirled together, perhaps dotted with sprinkles that evoke the freshness of blooming flowers or the playful spirit of Easter eggs. This isn’t just about taste; it’s about creating a visual feast that complements the spirit of the season. We’ll show you how to achieve stunning results that will impress your guests and bring an extra dose of cheer to your celebrations.
Ingredients:
- 16 ounces marshmallows (jumbo or mini both work fine)
- 7 cups Rice Krispies cereal
- 2 tablespoons unsalted butter, plus an additional ½ cup unsalted butter (for frosting)
- 3-4 cups powdered sugar (this allows for adjusting frosting consistency)
- ¼ cup milk
- 1 teaspoon vanilla extract
- Green food coloring
- Easter egg candies (mini chocolate eggs or jelly beans, for decoration)
Preparing the Rice Krispie Treat Base
Step 1: Melt the Marshmallows and Initial Butter
Begin extract by preparing your pan. Lightly grease a 9×13 inch baking pan with non-stick cooking spray or butter. This will prevent the treats from sticking and make them easier to remove later. In a large saucepan, melt the initial 2 tablespoons of unsalted butter over low heat. Once the butter is completely melted and shimmering, add the 16 ounces of marshmallows. Continue to stir the marshmallows constantly, ensuring they don’t scorch on the bottom of the pan. The goal is to melt them down into a smooth, gooey mass. This process usually takes about 5-7 minutes, depending on your stovetop’s heat. Keep the heat on low; rushing this step can lead to tough or burnt marshmallows, which will affect the final texture of your Easter Rice Krispie Treats.
Step 2: Combine Cereal with Melted Marshmallow Mixture
Once the marshmallows are fully melted and smooth, remove the saucepan from the heat. It’s crucial to work relatively quickly from this point on, as the marshmallow mixture will start to set as it cools. Gradually add the 7 cups of Rice Krispies cereal to the melted marshmallow mixture. Gently fold the cereal into the marshmallows using a large rubber spatula or wooden spoon. Make sure every single piece of cereal is coated in the sticky, gooey marshmallow. This thorough coating is what holds the treats together. Don’t overmix, but ensure there are no dry pockets of cereal.
Step 3: Press the Treats into the Pan
Transfer the Rice Krispies cereal and marshmallow mixture into your prepared 9×13 inch baking pan. Now, you’ll need to press the mixture evenly into the pan. You can use your spatula or the back of a spoon to gently press down. For an even smoother finish and to prevent sticking to your hands, lightly grease your hands with butter or non-stick spray before pressing. Alternatively, you can place a piece of parchment paper over the mixture and press down using a flat-bottomed glass or measuring cup. Ensure the mixture is pressed down firmly but not so hard that it crushes the cereal. Aim for an even thickness throughout the pan. Let the treats cool and set at room temperature for at least 30 minutes before proceeding to the frosting stage. This initial setting is important for the frosting to adhere properly.
Making the Easter Green Frosting
Step 4: Prepare the Frosting Base
While the Rice Krispie treat base is setting, you can prepare your vibrant green frosting. In a medium bowl, combine the additional ½ cup of unsalted butter (softened), 1 teaspoon of vanilla extract, and ¼ cup of milk. Whisk these ingredients together until they are well combined. Gradually add the powdered sugar, starting with 3 cups. Stir until smooth. If the frosting seems too thick, add more milk, a tablespoon at a time, until you reach your desired consistency. If it’s too thin, add more powdered sugar. The ideal consistency is spreadable but not runny.
Step 5: Color and Decorate Your Easter Rice Krispie Treats
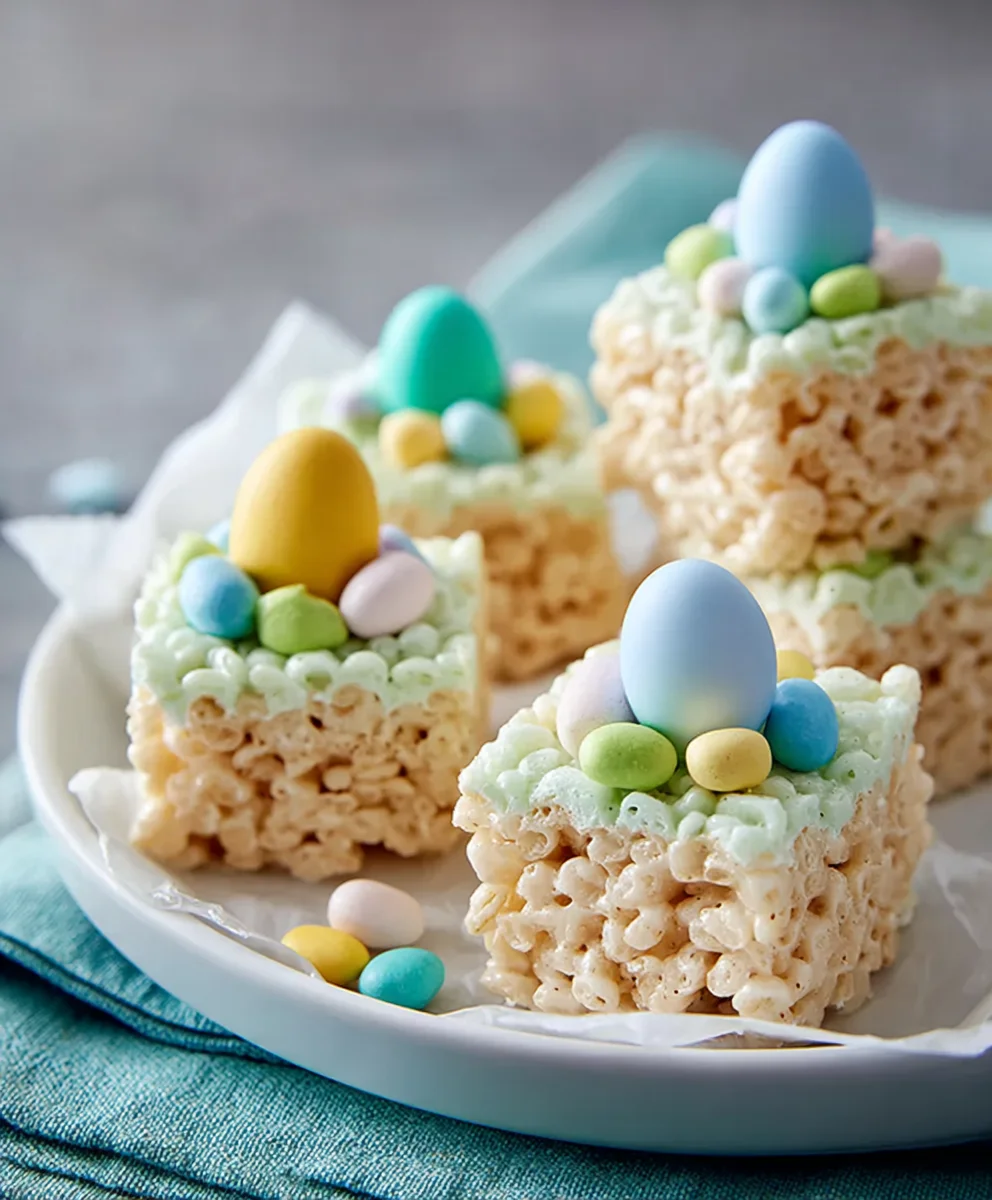
Once the Rice Krispie treat base has cooled and set sufficiently, it’s time to bring in the Easter spirit! Add a few drops of green food coloring to your prepared frosting. Start with a small amount and gradually add more until you achieve a cheerful Easter green hue. Stir the food coloring thoroughly into the frosting to ensure an even color distribution. Spread this green frosting evenly over the top of the set Rice Krispie treats. You can use an offset spatula or a butter knife for this. Immediately after frosting, while the frosting is still wet, artfully arrange your Easter egg candies (mini chocolate eggs or jelly beans) over the green frosting. Press them down gently so they adhere. You can create patterns, scatter them randomly, or make little “nests” with the candies. Allow the frosting to set slightly before cutting into squares or shapes for serving. This festive decoration makes these Easter Rice Krispie Treats perfect for any spring celebration.
Conclusion:
There you have it! Crafting these delightful Easter Rice Krispie Treats is a simple yet incredibly rewarding way to add a touch of festive cheer to your holiday celebrations. We’ve walked through the easy steps to create these classic, chewy treats, elevated with a spring-inspired twist. The magic truly happens with the colorful additions, making each bite a celebration. Remember, the beauty of these Easter Rice Krispie Treats lies in their adaptability, so feel free to get creative with your decorations!
For serving, these treats are perfect on their own as a fun snack. They also make fantastic additions to Easter baskets, party platters, or as a sweet ending to an Easter brunch. You can also break them into smaller pieces and use them as a delightful topping for Easter-themed cupcakes or ice cream sundaes. Don’t be afraid to experiment with different pastel food coloring or even incorporate a touch of edible glitter for extra sparkle. I encourage you to share these joyful treats with loved ones and enjoy the smiles they bring!
Frequently Asked Questions:
Q: Can I make Easter Rice Krispie Treats ahead of time?
A: Absolutely! These treats can be made 1-2 days in advance. Store them in an airtight container at room temperature. For best results, ensure they are completely cooled before storing to prevent them from becoming soggy.
Q: How can I make my Easter Rice Krispie Treats extra colorful?
A: The easiest way is to divide your melted marshmallow mixture into separate bowls before adding the cereal. Tint each bowl with a different pastel food coloring (pink, yellow, blue, green). Then, you can either layer the colors in your pan for a marbled effect or press them in separate sections for a striped look. You can also add colorful sprinkles and candies once the treats are pressed into the pan.
Q: My Easter Rice Krispie Treats are too hard. What went wrong?
A: This usually happens if the marshmallows are cooked for too long or if too much butter is used. It’s important to melt the marshmallows gently over low heat and remove them from the heat as soon as they are fully melted and smooth. Also, ensure you’re using the exact butter ratio specified in the recipe. Let them cool slightly before pressing them into the pan, and avoid pressing down too firmly.
Easter Rice Krispie Treats- Easy Holiday Fun
Easy and fun Easter-themed Rice Krispie Treats decorated with green frosting and candy eggs.
Ingredients
-
16 ounces marshmallows (jumbo or mini)
-
7 cups Rice Krispies cereal
-
2 tablespoons unsalted butter
-
½ cup unsalted butter
-
3-4 cups powdered sugar
-
¼ cup milk
-
1 teaspoon vanilla extract
-
Green food coloring
-
Easter egg candies (mini chocolate eggs or jelly beans)
Instructions
-
Step 1
Grease a 9×13 inch baking pan. In a large saucepan, melt 2 tablespoons of butter over low heat. Add marshmallows and stir constantly until melted and smooth, about 5-7 minutes. -
Step 2
Remove from heat. Gradually add 7 cups of Rice Krispies cereal to the melted marshmallows and gently fold until well coated. Do not overmix. -
Step 3
Transfer the mixture to the prepared pan. Press evenly into the pan using a greased spatula or hands. Alternatively, use parchment paper and a flat-bottomed glass. Let set for at least 30 minutes. -
Step 4
While the base sets, prepare the frosting. In a medium bowl, whisk together ½ cup softened butter, 1 teaspoon vanilla extract, and ¼ cup milk. Gradually add 3 cups of powdered sugar and stir until smooth. Adjust with more milk or powdered sugar for desired consistency. -
Step 5
Add green food coloring to the frosting until a cheerful Easter green is achieved. Spread evenly over the set Rice Krispie treats. Immediately arrange Easter egg candies on top while frosting is wet. Let set before cutting.
Important Information
Nutrition Facts (Per Serving)
It is important to consider this information as approximate and not to use it as definitive health advice.
Allergy Information
Please check ingredients for potential allergens and consult a health professional if in doubt.