Blue Moon Ice Cream- Ethereal Flavor Delight
Blue Moon Ice Cream is more than just a frozen treat; it’s a nostalgic trip back to childhood summers and a vibrant splash of fun in every scoop. Have you ever wondered about that uniquely bright, almost otherworldly blue hue and its delightful, subtly fruity, and slightly almond-like flavor? That’s the magic of Blue Moon Ice Cream! It’s a flavor that sparks curiosity and elicits smiles, making it a beloved classic for generations. Its distinctive color isn’t just for show; it hints at the whimsical experience of indulgin extractg in this delightful dessert. What makes Blue Moon Ice Cream so special is its playful nature – it’s a flavor that doesn’t take itself too seriously, offering a moment of pure, unadulterated joy. It’s the perfect centerpiece for a hot afternoon, a delightful addition to a birthday party, or simply a fantastic way to brighten your day.
Let’s Dive Into Creating Your Own Batch!
Prepare to be amazed by how easy it is to bring this iconic Blue Moon Ice Cream to your own freezer.
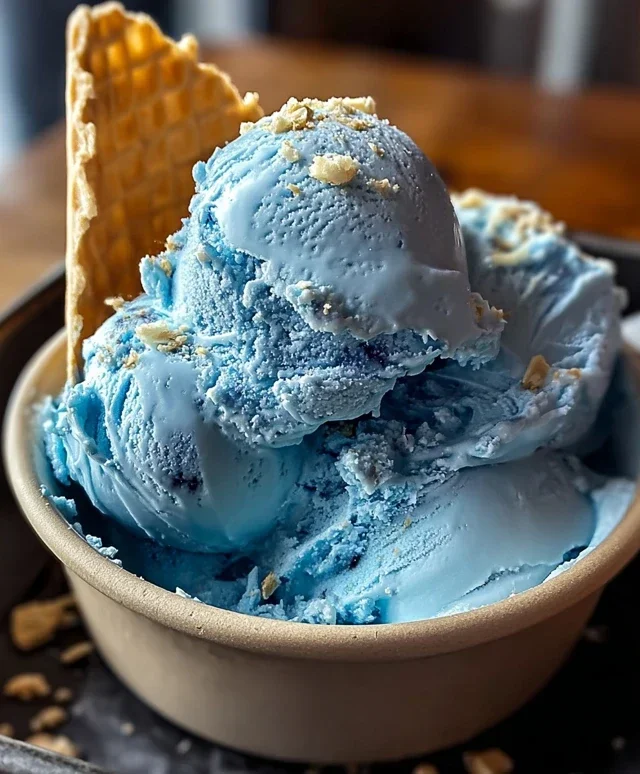
Blue Moon Ice Cream
There’s something undeniably enchanting about Blue Moon Ice Cream. Its vibrant, almost celestial hue, coupled with a flavor that’s a delightful mystery – often described as a mix of almond, vanilla, and a hint of something fruity – makes it a truly unique treat. It’s a nostalgic flavor for many, evoking childhood memories of carefree summer days and fun at the ice cream parlor. While the exact flavor profile is a closely guarded secret by many manufacturers, we can recreate a wonderfully delicious version right in our own kitchens. This recipe aims to capture that iconic blue brilliance and tantalizing taste, allowing you to churn out your own batch of this beloved frozen delight. Forget store-bought; homemade Blue Moon is an experience in itself!
Ingredients:
Making the Magic Happen
Crafting your own Blue Moon Ice Cream is a rewarding process that doesn’t require a degree in culinary arts. It’s all about bringin extractg together simple ingredients and allowing a little bit of science (and a lot of deliciousness) to unfold. The key to a creamy, rich ice cream lies in the high fat content of the heavy cream and the careful balance of sugar, which prevents it from freezing too hard.
Step 1: Preparing the Custard Base
The first step to creating our luscious Blue Moon Ice Cream is to prepare the base. In a medium-sized bowl, combine the granulated sugar with the whole milk. Stir these together thoroughly until the sugar is largely dissolved. You want to make sure there are no gritty sugar granules at the bottom of the bowl, as this will affect the final texture of your ice cream. You can gently warm the milk slightly if you find it difficult to dissolve the sugar, but be careful not to overheat it. Once the sugar is dissolved, whisk in the heavy cream, vanilla extract, and almond extract. This mixture forms the foundation of our ice cream, providing the creamy texture and the characteristic subtle almond-vanilla flavor. The almond extract is particularly important here, as it contributes significantly to the distinctive “mystery” flavor of Blue Moon.
Step 2: The All-Important Color Infusion
Now for the fun part – transforming our pnon-alcoholic ale mixture into a vibrant Blue Moon! This is where the blue food coloring comes in. Start by adding just a few drops of blue food coloring to the cream mixture. Stir it in thoroughly, then observe the color. Blue Moon Ice Cream is known for its bright, cheerful blue hue, so you’ll likely need more than just a couple of drops. Continue adding food coloring, a drop at a time, stirring well after each addition, until you achieve your desired shade of blue. It’s better to start with less and add more gradually to avoid over-coloring. Remember that the color will lighten slightly once the ice cream is frozen. If you’re feeling adventurous and want a slightly more complex flavor, you can add a tiny splash of cherry juice from the maraschino cherries at this stage as well, but it’s entirely optional.
Step 3: Chilling the Base to Perfection
Before we can churn our ice cream, it’s crucial that the base is thoroughly chilled. This is a critical step that ensures your ice cream maker can work efficiently and that the ice cream freezes properly. Cover the bowl containing your blue cream mixture tightly with plastic wrap. For the best results, refrigerate the mixture for at least 4 hours, or preferably overnight. This long chilling period allows the flavors to meld together beautifully and ensures the mixture is cold enough to freeze quickly in your ice cream maker. A well-chilled base means less churn time and a smoother, creamier final product. Don’t be tempted to skip this step!
Step 4: Churning the Blue Dream
Once your ice cream base is thoroughly chilled, it’s time to churn! Follow the instructions for your specific ice cream maker. Typically, you’ll pour the chilled mixture into the pre-frozen bowl of your ice cream maker and let it churn until it reaches a soft-serve consistency. This usually takes about 20 to 30 minutes, depending on your machine. During the churning process, the mixture will thicken as air is incorporated and it begin extracts to freeze. Keep an eye on it, as you want to stop churning when it’s thick but not completely frozen solid. If you’re adding the chopped maraschino cherries, this is the perfect time to gently fold them in during the last few minutes of churning. Their sweet, slightly tart bursts of flavor add a delightful textural contrast and a pop of color.
Step 5: Freezing to Full Firmness
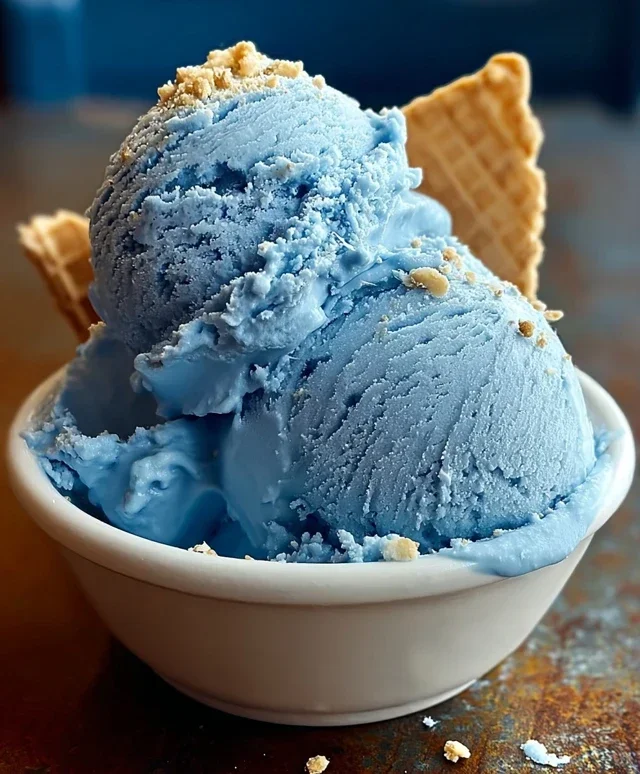
The churning process only gets your ice cream to a soft-serve consistency. To achieve that classic scoopable firmness, the ice cream needs to freeze further. Transfer the churned ice cream into an airtight freezer-safe container. Press a piece of parchment paper or plastic wrap directly onto the surface of the ice cream to prevent ice crystals from forming. Then, cover the container tightly with its lid. Place the container in the freezer and let it freeze for at least 4 to 6 hours, or until it’s firm enough to scoop. The longer it freezes, the firmer it will become. Once fully frozen, your homemade Blue Moon Ice Cream is ready to be enjoyed! Serve it in bowls or cones and savor every spoonful of this uniquely delightful treat.
Conclusion:
And there you have it! I hope you’ve enjoyed diving into this delightful Blue Moon Ice Cream recipe. This isn’t just any ice cream; it’s a vibrant, uniquely flavored treat that brings a sense of fun and nostalgia to any occasion. The combination of creamy texture and that signature, subtly fruity, almond-like zest makes it a truly memorable dessert. Whether you’re looking to impress guests at a summer barbecue, create a special birthday surprise, or simply indulge in a personal treat, this Blue Moon Ice Cream is guaranteed to be a hit. Don’t be afraid to experiment with the serving suggestions – a sprinkle of toasted almonds or a swirl of whipped cream can elevate it even further.
I encourage you to give this recipe a try. It’s surprisingly simple to make at home and the reward of scooping into your own batch of this iconic Blue Moon Ice Cream is immense. Happy churning!
Frequently Asked Questions about Blue Moon Ice Cream:
What makes Blue Moon Ice Cream blue?
The distinct blue color and unique flavor of Blue Moon Ice Cream typically come from a combination of food coloring (usually blue) and flavorings like almond extract or a proprietary blend that gives it that signature, slightly fruity and subtly sweet taste that many find reminiscent of marshmallow or amaretto extract.
Can I make Blue Moon Ice Cream without an ice cream maker?
Absolutely! While an ice cream maker produces the smoothest texture, you can achieve delicious Blue Moon Ice Cream using the no-churn method. Simply whip heavy cream and condensed milk together until stiff peaks form, then fold in your blue coloring and flavorings. Freeze in a loaf pan, stirring vigorously every 30-45 minutes for the first few hours to break up ice crystals.
What are some good serving suggestions for Blue Moon Ice Cream?
Beyond a classic cone, Blue Moon Ice Cream is fantastic served alongside vanilla cake or brownies, as a topping for fruit pies, or blended into a milkshake. A sprinkle of toasted coconut flakes or a maraschino cherry also adds a delightful touch.
Blue Moon Ice Cream
A classic, vibrant blue ice cream with a unique almond-vanilla flavor. This recipe is a non-alcoholic, dairy-based version.
Ingredients
-
2 cups heavy cream
-
1 cup whole milk
-
3/4 cup granulated sugar
-
1 teaspoon vanilla extract
-
1 teaspoon almond extract
-
Blue food coloring, as needed
-
1/4 cup maraschino cherries, chopped (optional)
Instructions
-
Step 1
In a large bowl, whisk together the heavy cream, whole milk, granulated sugar, vanilla extract, and almond extract until the sugar is fully dissolved. -
Step 2
Add blue food coloring gradually, stirring until you achieve your desired shade of blue. Start with a few drops and add more as needed. -
Step 3
If using, stir in the chopped maraschino cherries. -
Step 4
Pour the mixture into your ice cream maker and churn according to the manufacturer’s instructions. -
Step 5
Once churned, transfer the ice cream to a freezer-safe container. -
Step 6
Freeze for at least 4 hours, or until firm, before serving.
Important Information
Nutrition Facts (Per Serving)
It is important to consider this information as approximate and not to use it as definitive health advice.
Allergy Information
Please check ingredients for potential allergens and consult a health professional if in doubt.