Cherry Cheesecake Hand Pies-Easy Festive Treat
Cherry Cheesecake Hand Pies are the ultimate portable indulgence, a delightful twist on a classic dessert that’s guaranteed to disappear faster than you can say “more, please!”. Imagin extracte the creamy, tangy goodness of cheesecake combined with the sweet, vibrant burst of cherries, all encased in a perfectly flaky, golden-brown pastry. It’s no wonder this dessert has captured so many hearts – it delivers all the comfort and decadence of a full-sized cheesecake but in a convenient, individual package. What makes these Cherry Cheesecake Hand Pies truly special is the perfect balance of textures and flavors. The tender, slightly sweet cherry filling offers a beautiful contrast to the rich, smooth cheesecake cream cheese filling, while the buttery crust provides a satisfying crunch with every bite. Whether you’re bringin extractg them to a potluck, enjoying them as a special treat, or simply craving something utterly delicious, these hand pies are an absolute showstopper.
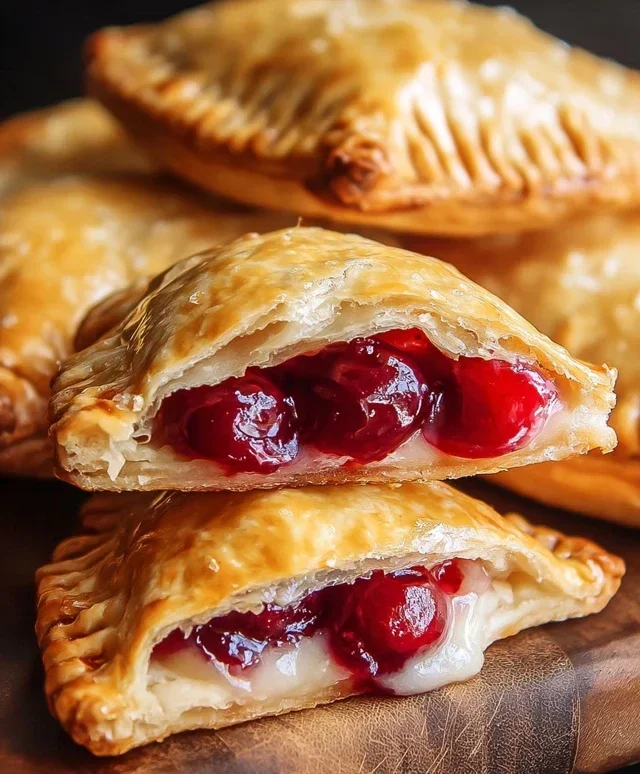
Cherry Cheesecake Hand Pies
There’s something undeniably comforting about a hand pie. It’s a perfectly portioned treat, easy to hold, and always a delightful surprise with every bite. And when you combine the creamy tang of cheesecake with the sweet burst of cherries, all wrapped up in a flaky, golden crust, you have a recipe for pure happiness. These Cherry Cheesecake Hand Pies are incredibly easy to make, thanks to using refrigerated pie crusts, making them an ideal dessert for any occasion, from a casual get-together to a special treat after dinner. Let’s get started!
Ingredients:
Preparing the Cheesecake Filling
The heart of these hand pies is a simple yet luscious cheesecake filling. The key to a smooth and creamy filling is ensuring your cream cheese is truly softened. I like to leave mine on the counter for at least an hour, or even pop it in the microwave for 15-20 second bursts, stirring in between, until it’s easily mashed with a fork. In a medium bowl, combine the softened cream cheese with the 1/4 cup of granulated sugar. Using a whisk or an electric mixer on low speed, beat them together until the mixture is smooth and well combined, with no lumps of cream cheese remaining. This ensures an even texture throughout your hand pies.
Assembling the Hand Pies
Now for the fun part: assembling these delightful little pockets of joy! Carefully unroll your package of refrigerated pie crusts onto a lightly floured surface. You’ll get two crusts, and we’ll use both. Using a round cookie cutter or even the rim of a glass (about 4-5 inches in diameter), cut out as many circles as you can from each crust. You should aim for at least 8-10 circles. Don’t worry if you have some scraps; you can gently press them together and re-roll them once to get a few more circles.
Once your circles are cut, it’s time to fill them. Take one circle and spoon about 1-2 tablespoons of the cherry pie filling onto one half of the circle, leaving a small border around the edge. Be careful not to overfill, as this can make sealing the pies difficult and potentially lead to leaks during frying. Next, add a small dollop (about a teaspoon) of the prepared cream cheese mixture on top of the cherry filling. This is what gives our hand pies that irresistible cheesecake flavor.
Now, gently fold the other half of the pie crust circle over the filling to create a half-moon shape. Use the tines of a fork to crimp the edges firmly, sealing the filling inside. This is a crucial step to prevent any of that delicious filling from escaping during the frying process. You want a good, secure seal. You can also use a pastry wheel for a decorative edge if you like. Place the assembled hand pies on a baking sheet lined with parchment paper as you work, ensuring they don’t touch each other.
Frying to Golden Perfection
Deep frying these hand pies is what gives them that wonderfully crispy, golden exterior. In a large, heavy-bottomed pot or Dutch oven, carefully pour in your vegetable oil. You’ll want enough oil so that the hand pies can be fully submerged and float freely. Heat the oil over medium-high heat until it reaches approximately 350°F (175°C). It’s important to monitor the oil temperature; too hot, and your pies will burn on the outside before the inside is cooked; too cool, and they’ll absorb too much oil and become greasy. You can test the oil temperature by dropping a tiny piece of pie crust into it; it should sizzle and float to the top immediately.
Carefully, and in batches, place 2-3 hand pies into the hot oil. Don’t overcrowd the pot, as this will lower the oil temperature and result in unevenly cooked pies. Fry for about 2-3 minutes per side, or until they are a deep golden brown and puffed up. Use a slotted spoon or spider strainer to gently turn them over and ensure even browning. Once they’re beautifully golden on both sides, carefully lift them out of the oil and place them on a wire rack set over a baking sheet lined with paper towels. This allows excess oil to drain away, keeping them delightfully crisp.
Creating the Glaze
While our hand pies are draining and still warm, it’s time to whip up a simple, sweet glaze to take them over the top. In a small bowl, combine the 1/2 cup of powdered sugar, 1 teaspoon of corn syrup, and 1 tablespoon of water. Corn syrup adds a lovely sheen and helps the glaze set slightly without becoming too hard. Stir everything together until you have a smooth, drizzle-able glaze. If the glaze is too thick, add a tiny bit more water, a teaspoon at a time, until it reaches your desired consistency.
Once the hand pies have drained for a few minutes and are still warm, you can generously drizzle this sweet glaze over the top. You can use a spoon or a piping bag for a more controlled drizzle. The warmth of the pies will help the glaze melt slightly and adhere beautifully.
Let the hand pies cool for a few minutes before serving. They are absolutely divine served warm, allowing the creamy cheesecake filling to be wonderfully gooey. You can also enjoy them at room temperature, and they make for fantastic portable treats. These Cherry Cheesecake Hand Pies are a guaranteed crowd-pleaser, and the best part is, they’re so simple to make, you’ll be whipping them up again and again! Enjoy every delicious, flaky bite.

Conclusion:
There you have it – your guide to creating absolutely delightful Cherry Cheesecake Hand Pies! These little pockets of joy are perfect for so many reasons. They offer the classic, creamy richness of cheesecake, beautifully complemented by the tart sweetness of cherries, all encased in a flaky, buttery crust. The individual portions make them incredibly convenient for parties, picnics, or simply as a delightful treat for yourself. I truly encourage you to give this Cherry Cheesecake Hand Pie recipe a try; you won’t be disappointed!
For serving, these hand pies are wonderful on their own, but they also pair beautifully with a dollop of whipped cream or a drizzle of extra cherry sauce. They’re fantastic served warm or at room temperature. Thinking about variations? Feel free to experiment with other fruit fillings like blueberry or raspberry. You could also add a hint of almond extract to the cream cheese filling for a subtle nutty flavor. The possibilities are endless, and the result is always a crowd-pleasing dessert!
Frequently Asked Questions:
Can I make the dough ahead of time?
Absolutely! The pie dough can be made up to 2 days in advance and stored in the refrigerator. Just make sure to wrap it tightly in plastic wrap. For longer storage, you can freeze the dough for up to 3 months. Thaw it overnight in the refrigerator before using.
What can I do if my filling is too runny?
If your cherry filling seems a bit too liquidy, you can thicken it by adding a teaspoon or two of cornstarch mixed with a little cold water (a slurry) and simmering it for a minute until it thickens. For the cheesecake filling, ensuring your cream cheese and eggs are at room temperature helps create a smoother, thicker mixture.
How should I store leftover hand pies?
Store any leftover Cherry Cheesecake Hand Pies in an airtight container in the refrigerator for up to 3-4 days. They can be enjoyed cold, or gently reheated in a low oven or toaster oven for a few minutes to revive the flaky crust.
Cherry Cheesecake Hand Pies
Delicious and easy hand pies filled with a creamy cheesecake and tart cherry mixture, perfect for a sweet treat.
Ingredients
-
1/4 cup granulated sugar
-
4 oz cream cheese, softened
-
21 oz can cherry pie filling
-
1 package refrigerated pie crust (2 crusts)
-
1/2 cup powdered sugar
-
1 teaspoon corn syrup
-
1 tablespoon water
-
Vegetable oil, for deep frying (about 4-6 cups)
Instructions
-
Step 1
In a medium bowl, beat together the softened cream cheese and granulated sugar until smooth. -
Step 2
Gently fold in the cherry pie filling until combined. -
Step 3
Unroll the refrigerated pie crusts and cut each into four equal circles (you should have 8 circles total). -
Step 4
Spoon about 2 tablespoons of the cherry cream cheese mixture onto one half of each pie crust circle. Moisten the edges with water, then fold the other half of the crust over the filling, pressing the edges to seal. Crimp with a fork. -
Step 5
Heat vegetable oil in a large skillet or Dutch oven over medium-high heat to 350°F (175°C). -
Step 6
Carefully place 1-2 hand pies into the hot oil and fry for 2-3 minutes per side, until golden brown and crispy. Remove with a slotted spoon and drain on paper towels. -
Step 7
In a small bowl, whisk together the powdered sugar, corn syrup, and water until smooth for the glaze. Drizzle over the warm hand pies.
Important Information
Nutrition Facts (Per Serving)
It is important to consider this information as approximate and not to use it as definitive health advice.
Allergy Information
Please check ingredients for potential allergens and consult a health professional if in doubt.