Chocolate Chip Oreo Cheesecake Bars-Decadent Treat
Chocolate Chip Oreo Cheesecake Bars are the ultimate indulgence, a dessert that dreams are made of. Imagin extracte the rich, creamy decadence of classic cheesecake, swirled with chunks of your favorite chocolate chips, all nestled atop a crunchy, familiar Oreo crust. This isn’t just any dessert; it’s a symphony of textures and flavors that has captivated dessert lovers everywhere. We adore these bars because they deliver that comforting cheesecake experience with an exciting twist. The perfect balance of sweet, creamy, and slightly bitter chocolate, combined with the satisfying crum extractble of Oreos, makes them utterly irresistible. Forget complicated cheesecakes; these Chocolate Chip Oreo Cheesecake Bars are surprisingly simple to make, yet they taste like they came straight from a gourmet bakery. Get ready to impress yourself and everyone you share them with!
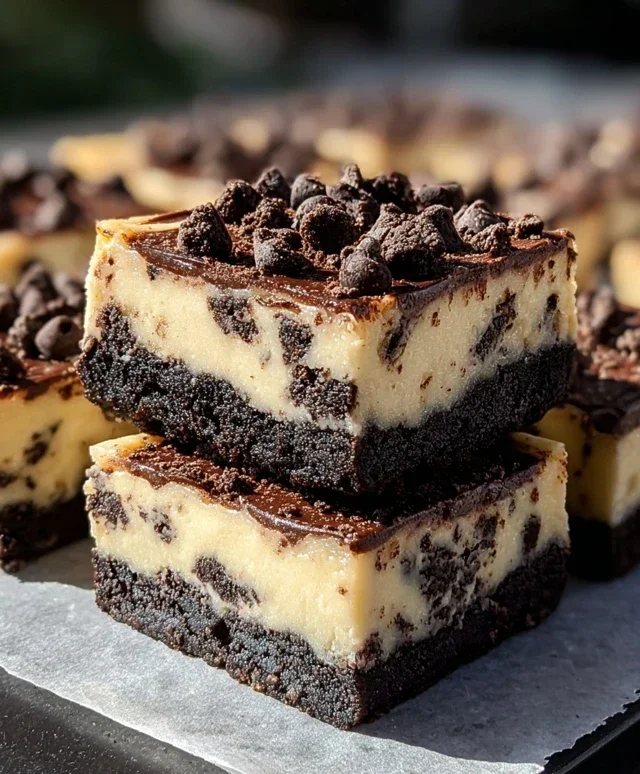
Chocolate Chip Oreo Cheesecake Bars
Get ready to indulge in a dessert that’s truly the best of both worlds! These Chocolate Chip Oreo Cheesecake Bars are a dreamy combination of creamy, tangy cheesecake and the irresistible crunch of Oreos, all topped with delightful chocolate chips. Forget the fuss of a full cheesecake; these bars offer all the decadent flavor in a more manageable and infinitely shareable format. They’re perfect for potlucks, family gatherings, or honestly, just a Tuesday night treat. The secret lies in the layered approach, starting with a simple Oreo crum extractb crust, followed by a luscious cheesecake filling, and finished with a decadent chocolate chip cookie topping. Trust me, one bite and you’ll be hooked!
Ingredients:
Instructions:
Step 1: Prepare the Oreo Crust
To begin extract this delightful journey, we need to create our foundation. Take your 2 cups of Oreo cookie crum extractbs and combine them in a medium bowl with the 5 tablespoons of melted unsalted butter. Give it a good stir until all the crum extractbs are moistened. This is your crust mixture. Now, grab an 8×8 inch baking pan and line it with parchment paper, leaving some overhang on the sides. This overhang will be a lifesaver when it comes time to lift the bars out of the pan. Press the Oreo crum extractb mixture evenly into the bottom of the prepared pan. You can use the bottom of a glass or a flat measuring cup to get a nice, compact layer. Pop this pan into the freezer for about 10-15 minutes while you prepare the cheesecake filling. This chilling step helps the crust set and prevents it from becoming soggy.
Step 2: Make the Luscious Cheesecake Filling
In a large bowl, beat the 16 ounces of softened cream cheese until it’s wonderfully smooth and creamy. This is crucial for a lump-free cheesecake filling. Gradually add the 1/2 cup of granulated sugar and the 1 teaspoon of vanilla extract, continuing to beat until everything is well combined and fluffy. Next, add the 2 eggs, one at a time, beating well after each addition. Don’t overmix at this stage, just ensure each egg is incorporated. Finally, gently fold in the 1/2 cup of sour cream. The sour cream adds a lovely tang and extra richness to the cheesecake. Once your cheesecake filling is smooth and velvety, carefully pour it over the chilled Oreo crust in the baking pan. Spread it out evenly with a spatula.
Step 3: Craft the Chocolate Chip Cookie Topping
Now for the pièce de résistance – the chocolate chip cookie topping! In a separate medium bowl, cream together the 1/2 cup of softened unsalted butter with the 1/3 cup of brown sugar and 1/4 cup of granulated sugar until the mixture is light and fluffy. This is where a hand mixer or a stand mixer really comes in handy. Stir in the 1 teaspoon of vanilla extract and then the 1 egg until just combined. In another small bowl, whisk together the 1 1/4 cups of all-purpose flour, 1/2 teaspoon of baking soda, and 1/4 teaspoon of salt. Gradually add the dry ingredients to the wet ingredients, mixing on low speed or by hand until just combined. Be careful not to overmix the cookie dough; we want it to be tender. At this point, you can gently stir in your favorite chocolate chips if you’d like an extra chocolatey kick, though the cookie itself provides plenty of deliciousness.
Step 4: Assemble and Bake the Bars
Now it’s time to bring it all together! Crum extractble the cookie dough mixture evenly over the cheesecake filling. You can do this by dropping spoonfuls of dough and then gently spreading it out, or by using your fingers to break off small pieces and press them down slightly. Don’t worry if the topping isn’t perfectly uniform; a slightly rustic look is part of its charm. Preheat your oven to 350°F (175°C). Place the prepared baking pan on a baking sheet (this helps catch any potential drips and makes it easier to handle). Bake for 30-35 minutes, or until the cookie topping is golden brown and the cheesecake filling is set around the edges but may still jiggle slightly in the center. It will continue to set as it cools.
Step 5: Chill and Serve Your Masterpiece
Once baked, remove the pan from the oven and let it cool completely on a wire rack. This is probably the hardest part – waiting! Once cooled to room temperature, cover the pan with plastic wrap and refrigerate for at least 2-3 hours, or preferably overnight. This chilling period is essential for the cheesecake bars to firm up properly, allowing for clean cuts and the best texture. When you’re ready to serve, use the parchment paper overhang to carefully lift the entire block out of the pan. Place it on a cutting board and slice into bars using a sharp knife. For extra clean cuts, you can wipe the knife clean between each slice. Enjoy these incredible Chocolate Chip Oreo Cheesecake Bars – they are truly a dream come true for any dessert lover!
Conclusion:
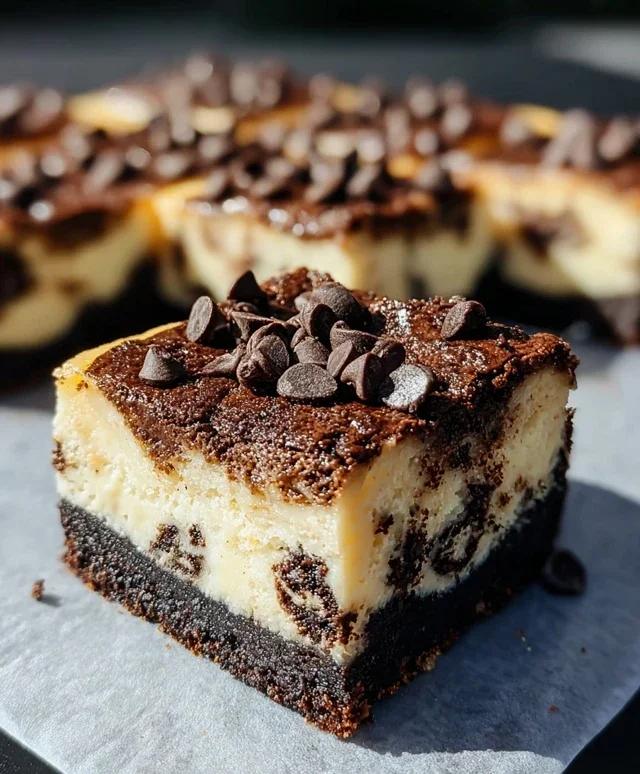
These Chocolate Chip Oreo Cheesecake Bars are an absolute triumph! They combine the creamy, dreamy texture of classic cheesecake with the irresistible crunch and chocolatey goodness of Oreos and chocolate chips. The buttery Oreo crust provides the perfect foundation for the rich, decadent cheesecake filling, making each bite a delightful explosion of flavor and texture. They are surprisingly easy to make, requiring no special techniques, and are perfect for any occasion, from casual get-togethers to more formal dessert spreads. I’m confident you’ll fall in love with these bars just as much as I have!
When it comes to serving, these bars are incredibly versatile. They’re fantastic on their own, but you can elevate them further with a dollop of whipped cream, a drizzle of chocolate sauce, or even a few fresh berries for a pop of color and freshness. For variations, feel free to experiment! You could add a layer of caramel sauce between the crust and filling, or perhaps swirl in some peanut butter for a nutty twist. Even adding different types of chocolate chips, like dark or white chocolate, can create a whole new flavor profile.
I wholeheartedly encourage you to give these Chocolate Chip Oreo Cheesecake Bars a try. They are sure to become a crowd-pleaser and a go-to recipe for your dessert repertoire. The combination of familiar flavors in a new bar format is simply divine!
Frequently Asked Questions:
Can I make these bars ahead of time?
Absolutely! These bars are perfect for making ahead. In fact, they often taste even better after chilling for at least a few hours or overnight, allowing the flavors to meld beautifully.
How should I store leftover cheesecake bars?
Leftover Chocolate Chip Oreo Cheesecake Bars should be stored in an airtight container in the refrigerator. They will keep well for up to 3-4 days.
Can I use a different type of cookie for the crust?
While Oreos are fantastic, you can certainly experiment! Chocolate grabeef ham crackers or even crushed chocolate sandwich cookies other than Oreos would also make a delicious crust.
Chocolate Chip Oreo Cheesecake Bars
Decadent cheesecake bars with a crushed Oreo crust, a rich cheesecake filling, and a chocolate chip crumble topping.
Ingredients
-
2 cups Oreo cookie crumbs (about 20 Oreos)
-
5 tbsp unsalted butter, melted
-
16 oz cream cheese, softened
-
1/2 cup granulated sugar
-
1 tsp vanilla extract
-
2 eggs
-
1/2 cup sour cream
-
1/2 cup unsalted butter, softened
-
1/3 cup brown sugar
-
1/4 cup granulated sugar
-
1 tsp vanilla extract
-
1 egg
-
1 1/4 cups all-purpose flour
-
1/2 tsp baking soda
-
1/4 tsp salt
Instructions
-
Step 1
Preheat oven to 350°F (175°C). Line an 8×8 inch baking pan with parchment paper, leaving an overhang. -
Step 2
In a medium bowl, combine Oreo cookie crumbs and 5 tbsp melted butter. Press mixture evenly into the bottom of the prepared pan for the crust. -
Step 3
In a large bowl, beat cream cheese, 1/2 cup granulated sugar, and 1 tsp vanilla extract until smooth. Beat in 2 eggs one at a time, then stir in sour cream. -
Step 4
Pour cheesecake filling over the Oreo crust. Smooth the top. -
Step 5
In a separate bowl, combine 1/2 cup softened butter, brown sugar, 1/4 cup granulated sugar, 1 tsp vanilla extract, and 1 egg. Mix until well combined. -
Step 6
Whisk together flour, baking soda, and salt. Gradually add dry ingredients to the butter mixture, mixing until just combined to form the crumble topping. -
Step 7
Sprinkle the crumble topping evenly over the cheesecake layer. -
Step 8
Bake for 30-35 minutes, or until the edges are set and the center is almost set. -
Step 9
Let cool completely in the pan on a wire rack, then chill in the refrigerator for at least 2 hours before cutting into bars.
Important Information
Nutrition Facts (Per Serving)
It is important to consider this information as approximate and not to use it as definitive health advice.
Allergy Information
Please check ingredients for potential allergens and consult a health professional if in doubt.