Hawaiian Roll Grilled Cheese-Sweet & Savory Bliss
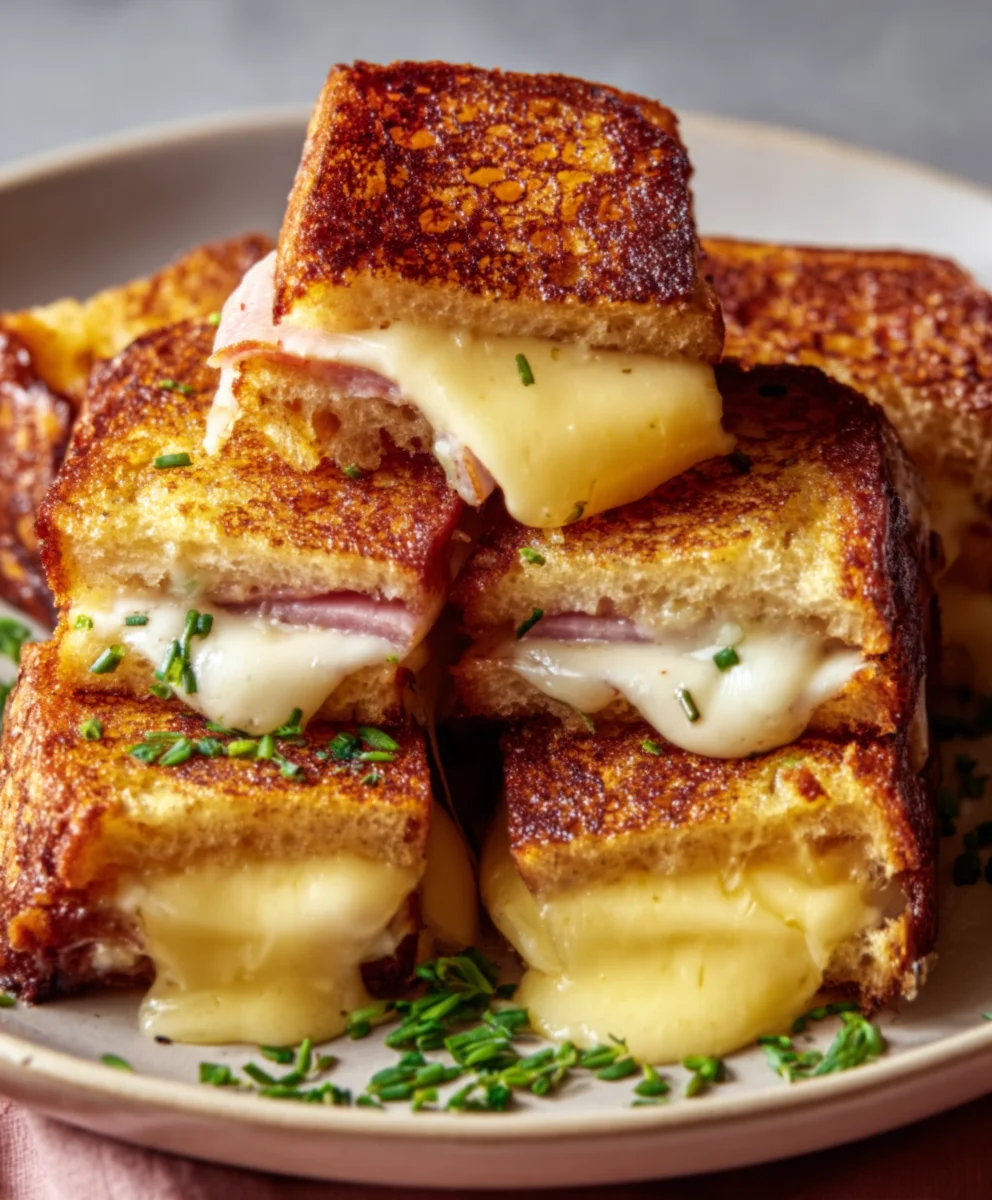
Hawaiian Roll Grilled Cheese sandwiches are more than just a quick meal; they’re a nostalgic hug in food form, a delightful journey back to simpler times filled with buttery goodness and comforting flavors. What is it about these miniature, slightly sweet buns that elevates a classic grilled cheese to something truly magical? It’s the perfect balance: the tender, almost cake-like texture of the Hawaiian rolls, kissed with melted butter as they crisp up on the griddle, creating a delightful contrast with the gooey, stretchy cheese within. This isn’t your everyday lunchbox staple; this is a weekend treat, a delightful appetizer for gatherings, or even a sweet and savory indulgence any time of day. Prepare yourself for a culinary experience that’s both familiar and wonderfully surprising, making every bite of this Hawaiian Roll Grilled Cheese a moment to savor.
Why We Adore Them
There’s an undeniable charm to a Hawaiian Roll Grilled Cheese. The subtle sweetness of the rolls cuts through the richness of the cheese beautifully, creating a flavor profile that’s simply addictive. They’re perfectly portioned, making them ideal for little hands, party platters, or simply enjoying a few without feeling overwhelmed. The quick cooking time means you can satisfy that craving in minutes, and the ingredients are so accessible, you likely have everything you need in your pantry right now. This recipe takes a beloved comfort food and gives it a playful, approachable twist that’s guaranteed to bring smiles to faces.
What Makes Them Special
The secret ingredient, if you can call it that, is the bun itself. Unlike standard bread, Hawaiian rolls boast a unique texture and a hint of sweetness that caramelizes beautifully when grilled. This transformation is key to their special appeal. When paired with the right cheese – think sharp cheddar, creamy Gruyère, or a melty blend – the result is a symphony of textures and tastes. The edges get perfectly crisp and golden brown, while the inside remains soft and yielding. It’s this magical combination that transforms a simple sandwich into an extraordinary delight, proving that sometimes, the simplest ingredients can create the most memorable dishes.
Ingredients:
- 4 Hawaiian rolls
- 1 cup shredded Monterey Jack cheese
- 2 tablespoons unsalted butter
- Optional: Sliced tomatoes or crispy beef beef bacon
Preparation
Slicing the Rolls
The foundation of our delightful Hawaiian roll grilled cheese lies in the rolls themselves. Begin extract by taking your four Hawaiian rolls. These slightly sweet, soft rolls are perfect for this application as their unique texture and subtle sweetness complement the savory cheese beautifully. Using a serrated knife, carefully slice each Hawaiian roll horizontally in half, just like you would a beef hamburger bun. The goal is to create two distinct halves for each roll, providing you with a top and a bottom piece to assemble your sandwiches. Be gentle to avoid squishing the soft bread. If your rolls are particularly large, you might want to lay them flat on a cutting board for stability before slicing. Ensure the cuts are relatively even so your sandwiches will cook and toast uniformly.
Preparing the Cheese
For this recipe, we’re using one cup of shredded Monterey Jack cheese. Monterey Jack is a fantastic choice for grilled cheese because it melts incredibly well, creating that coveted gooey, stretchy texture that makes a grilled cheese so satisfying. If you purchased a block of Monterey Jack, shredding it yourself often results in better melting than pre-shredded varieties, which can sometimes contain anti-caking agents. If you prefer, you can also mix in other cheeses that melt well, such as mild cheddar or Colby Jack, to add another layer of flavor complexity. However, for a classic Hawaiian roll grilled cheese, the creamy mildness of Monterey Jack is ideal.
Assembling the Sandwiches
Layering the Cheese
Now it’s time to bring our ingredients together. Take the bottom halves of your sliced Hawaiian rolls and lay them out on a clean surface. Generously sprinkle half of the shredded Monterey Jack cheese evenly over each of the bottom halves. Don’t be shy with the cheese; this is where the magic happens. The cheese will melt and ooze, binding the sandwich together and creating that irresistible cheesy pull. If you’re using any optional additions like sliced tomatoes or crispy beef baconbacon, this is the stage to add them. Place a thin layer of your chosen optional ingredient over the cheese on each bottom half. This ensures they are nestled within the sandwich and will heat through nicely.
Completing the Sandwich
Once your cheese (and optional additions) are in place, it’s time to cap off your sandwiches. Take the top halves of the Hawaiian rolls and place them gently on top of the cheese-covered bottom halves. You should now have four complete, un-toasted sandwiches. Press down lightly on the top of each sandwich to ensure everything is snug and ready for the next step. The goal is to create well-formed sandwiches that will hold their shape as they cook, preventing excessive cheese from escaping during the grilling process.
Grilling the Sandwiches
Butter the Pan and Sandwiches
This is where the transformgin extracton begins. Heat a non-stick skillet or a griddle over medium heat. While the pan is heating, take your two tablespoons of unsalted butter. You can either melt the butter in the pan and then coat the sandwiches, or you can spread softened butter directly onto the outside of your Hawaiian rolls. For the most even and golden-brown crust, I prefer to spread the butter on the outside of each sandwich. Lightly butter the top side of each assembled sandwich. This butter will not only contribute to a beautiful golden-brown exterior but also to a delightful crispness and added flavor.
The First Sear
Once your skillet is heated and the butter is shimmering (if melted in the pan) or you’ve buttered the sandwiches, carefully place two of the buttered sandwiches, butter-side down, into the hot skillet. You should hear a gentle sizzle, which is a good indication that your pan is at the right temperature. Let these sandwiches cook undisturbed for approximately 3-4 minutes. The key here is medium heat. Too high, and the bread will burn before the cheese has a chance to melt properly. Too low, and the bread might become tough rather than crisp. Keep an eye on the bottom of the sandwich; you’re looking for a deep golden-brown color. This initial sear is crucial for developing that signature grilled cheese texture.
Flipping and Grilling the Second Side
After the first side has achieved a beautiful golden-brown hue, it’s time to flip. Using a thin spatula, carefully lift and flip each sandwich. Now, butter the top side of the sandwiches that is now facing up. Continue to cook for another 3-4 minutes, or until the second side is also golden brown and the cheese inside is thoroughly melted and gooey. You might see some cheese starting to ooze out the sides – that’s a good sign of a perfectly melted interior! You can gently press down on the sandwiches with your spatula during this second cooking phase to encourage even browning and ensure the cheese is fully melted. If the bread is browning too quickly but the cheese isn’t fully melted, you can reduce the heat slightly and cover the pan loosely with a lid for a minute or two to trap some steam and help the cheese melt.
Finishing Touches and Serving
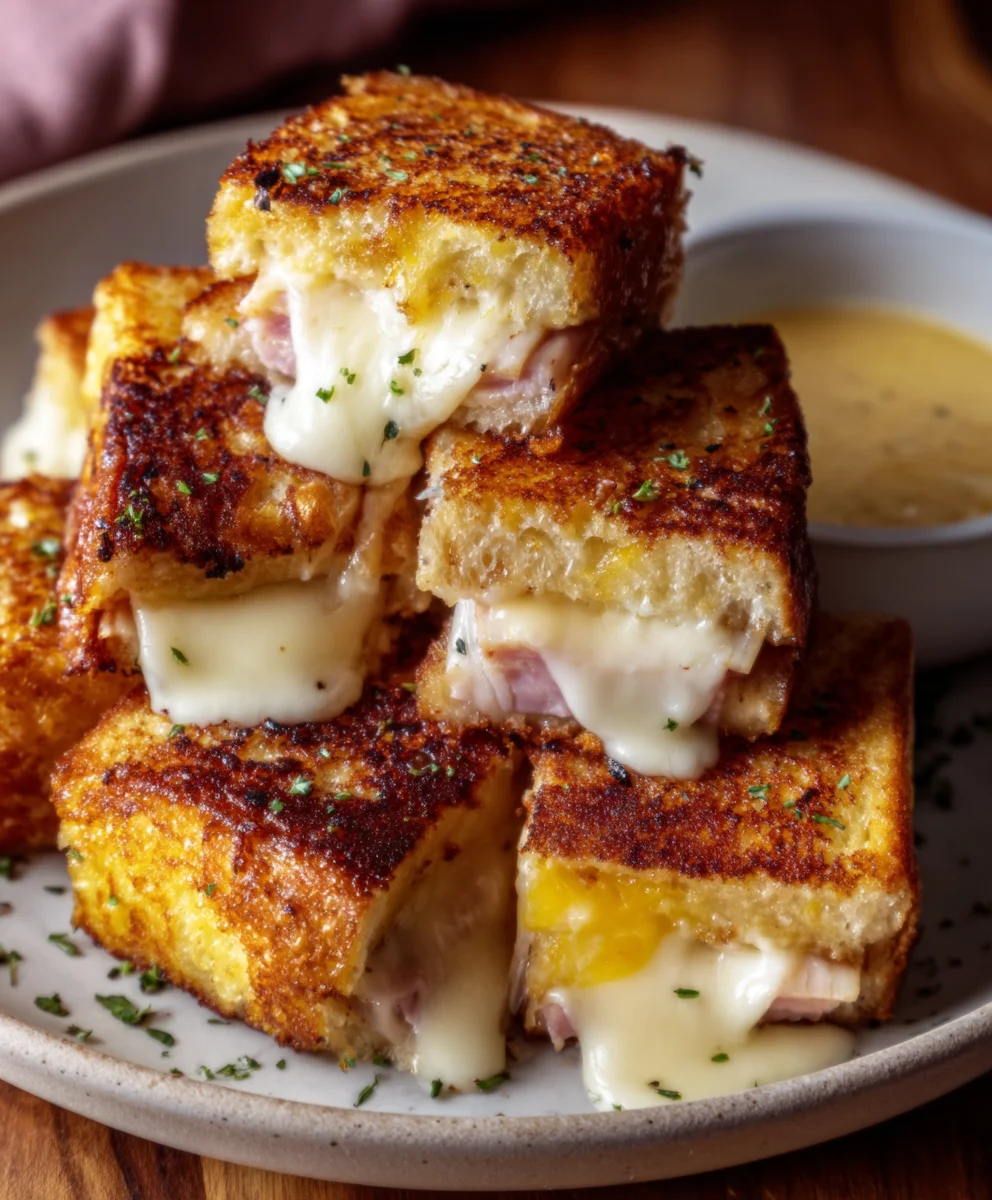
Once both sides are perfectly golden brown and the cheese is gloriously melted and oozing, your Hawaiian roll grilled cheese sandwiches are ready to be enjoyed. Carefully remove them from the skillet and place them on a plate. If you opted for the optional sliced tomatoes, they should be tender and warmed through, andbeef baconbeef bacon should be delightfully crispy. For the best experience, serve these immediately while they are hot and the cheese is at its melty best. A simple slice in half diagonally can make them even more appealing to look at and easier to handle. These are fantastic on their own or served with a side of tomato soup or a crisp salad.
Conclusion:
There you have it – the ultimate guide to creating the most delicious Hawaiian Roll Grilled Cheese! We’ve walked through the simple steps to elevate this classic comfort food using the sweetness of Hawaiian rolls, the gooey goodness of melted cheese, and a hint of buttery perfection. The result is a sandwich that’s both satisfying and incredibly easy to whip up, making it a perfect weeknight meal or a delightful weekend treat.
These Hawaiian Roll Grilled Cheese sandwiches are wonderfully versatile. Serve them alongside a hearty bowl of tomato soup for an unbeatable combination, or pair them with a crisp side salad for a lighter, yet equally satisfying, meal. For variations, consider adding a thin slice of beef ham or turkey for a bit of protein, or a smear of Dijon mustard for an extra layer of flavor. You could also experiment with different cheese blends – cheddar and Monterey Jack are always a crowd-pleaser, but don’t hesitate to try Gruyere or even a mild provolone!
Don’t be afraid to get creative and make this recipe your own. The joy of cooking is in the experimentation, and this Hawaiian Roll Grilled Cheese is the perfect canvas for your culinary adventures. So gather your ingredients, get that skillet ready, and enjoy crafting your own perfect cheesy masterpiece!
Frequently Asked Questions:
Can I use a different type of bread?
While Hawaiian rolls are key to the unique sweetness and texture of this recipe, you can certainly experiment with other soft, slightly sweet breads like brioche or challah. However, the classic Hawaiian Roll Grilled Cheese truly shines with its namenon-alcoholic sake.
What’s the best cheese to use for a gooey melt?
For that irresistible gooey factor, cheeses that melt well are essential. Sharp cheddar, Monterey Jack, and a good quality provolone are excellent choices. You can also mix and match for a more complex flavor profile, ensuring at least one cheese has good melting properties.
Can I make these ahead of time?
Grilled cheese is best enjoyed fresh off the skillet. However, you can prepare the sandwich components (like grating cheese) ahead of time to speed up the cooking process when you’re ready to eat.
Hawaiian Roll Grilled Cheese-Sweet & Savory Bliss
A delightful grilled cheese sandwich made with sweet Hawaiian rolls, gooey Monterey Jack cheese, and a touch of savory bliss. Perfect for a quick and satisfying meal.
Ingredients
-
4 Hawaiian rolls
-
1 cup shredded Monterey Jack cheese
-
2 tablespoons unsalted butter
-
Optional: Sliced tomatoes
-
Optional: Crispy beef bacon
Instructions
-
Step 1
Slice each Hawaiian roll horizontally in half using a serrated knife, creating top and bottom pieces. -
Step 2
Generously sprinkle half of the shredded Monterey Jack cheese evenly over the bottom halves of the rolls. Add optional sliced tomatoes or crispy beef bacon at this stage. -
Step 3
Place the top halves of the Hawaiian rolls on top of the cheese-covered bottom halves to complete the sandwiches. Press down lightly. -
Step 4
Heat a non-stick skillet or griddle over medium heat. Spread softened butter on the outside of each assembled sandwich, or melt butter in the pan and coat the sandwiches. -
Step 5
Carefully place two sandwiches, butter-side down, into the hot skillet. Cook for 3-4 minutes until golden brown. Flip, butter the top side, and cook for another 3-4 minutes until the second side is golden brown and the cheese is melted and gooey. -
Step 6
Remove sandwiches from the skillet, slice in half diagonally, and serve immediately.
Important Information
Nutrition Facts (Per Serving)
It is important to consider this information as approximate and not to use it as definitive health advice.
Allergy Information
Please check ingredients for potential allergens and consult a health professional if in doubt.