Red Velvet Banana Bread-Decadent Sweet Treat
Red Velvet Banana Bread: a fusion so brilliant, it’s almost criminal. We’ve all fallen head over heels for the comforting embrace of classic banana bread, haven’t we? That moist, tender crum extractb, the sweet aroma that fills the kitchen… it’s pure bliss. But what if we could elevate that beloved treat to a whole new level of decadent delight? Enter Red Velvet Banana Bread, the showstopper that takes everything you love about both desserts and combines them into one magnificent loaf. The rich, slightly tangy red velvet cake batter, with its signature chocolatey undertones and vibrant hue, marries perfectly with the natural sweetness and soft texture of ripe bananas. This isn’t just banana bread; it’s an experience. It’s the perfect treat for brunch, a special occasion, or simply when you crave something a little more extraordinary than your average slice. Get ready to bake your new obsession!
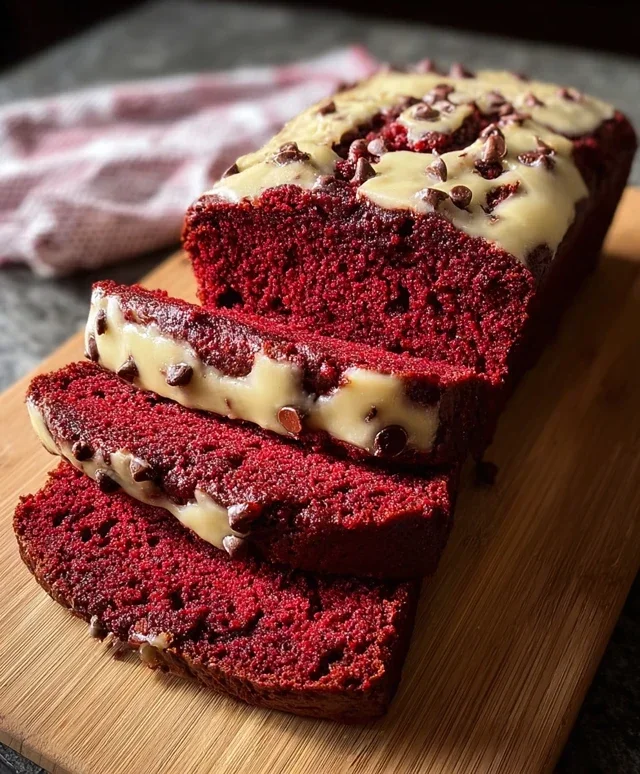
Red Velvet Banana Bread
There’s something inherently comforting about banana bread. It’s that perfect blend of sweet, moist, and satisfying that makes it a go-to for breakfast, snacks, or even a light dessert. But what if we could elevate this classic, giving it a fun, festive twist? Enter Red Velvet Banana Bread. This recipe takes everything you love about traditional banana bread – the tender crum extractb, the natural sweetness from ripe bananas – and infuses it with the characteristic richness and vibrant hue of red velvet. It’s a delightful surprise that’s as beautiful as it is delicious, perfect for holidays, celebrations, or just when you want to add a splash of color to your day. The subtle cocoa undertones, combined with the sweetness of banana and the creamy richness of buttermilk, create a flavor profile that’s truly unique and utterly irresistible.
Ingredients:
Cooking Instructions
Let’s get started on this vibrant and delicious Red Velvet Banana Bread!
Step 1: Prepare Your Wet Ingredients
First things first, preheat your oven to 350°F (175°C) and grease and flour a standard 9×5 inch loaf pan. This ensures our beautiful bread won’t stick and will release easily once baked. In a large mixing bowl, begin extract by mashing your three ripe bananas. The riper the bananas, the sweeter and more flavorful your bread will be. Aim for a smooth, pureed consistency. Next, add the melted unsalted butter and granulated sugar to the mashed bananas. Whisk these together until well combined. This mixture forms the base of our moist and tender bread. Once that’s incorporated, crack in your two large eggs, one at a time, whisking well after each addition until the mixture is smooth and slightly lighter in color. Finally, stir in the vanilla extract. This combination of sweet, creamy, and fragrant ingredients is going to make our red velvet banana bread absolutely sing.
Step 2: Combine the Dry Ingredients
In a separate medium-sized bowl, whisk together the all-purpose flour, cocoa powder, baking soda, and salt. It’s important to whisk these dry ingredients thoroughly to ensure that the leavening agents (baking soda) and salt are evenly distributed throughout the flour mixture. This will help your bread rise evenly and prevent any pockets of saltiness or leavening. The cocoa powder, while not a primary flavor here, adds a subtle depth that complements the red velvet profile and the banana beautifully.
Step 3: Infuse with Red Velvet Magic
Now for the fun part – the red velvet transformation! To the wet ingredients, add the 1 tablespoon of red food coloring. Stir it in until you achieve a vibrant, consistent red hue. Don’t be shy; this is what gives our bread its signature color! Next, gradually pour in the buttermilk. Buttermilk is a key ingredient in red velvet recipes as its acidity reacts with the baking soda to create a tender crum extractb and a slight tang that balances the sweetness. Whisk gently until the buttermilk is just incorporated. The batter will start to look beautifully rich and red.
Step 4: Marry Wet and Dry, and Add Extras
Now it’s time to combine the wet and dry ingredients. Gradually add the dry ingredients to the wet ingredients, mixing on low speed or by hand with a spatula until just combined. Be careful not to overmix at this stage. Overmixing can develop the gluten in the flour too much, resulting in a tough loaf. A few streaks of flour remaining are perfectly fine, as they will disappear during baking. If you’re adding chocolate chips for an extra burst of decadence, gently fold them into the batter now. They’ll be little pockets of melted chocolate goodness throughout your bread!
Step 5: Bake to Perfection
Pour the batter evenly into your prepared loaf pan. Smooth the top with your spatula. Place the loaf pan in the preheated oven and bake for 50-65 minutes. The baking time can vary depending on your oven, so it’s a good idea to start checking around the 50-minute mark. The bread is done when a wooden skewer or toothpick inserted into the center comes out clean or with just a few moist crum extractbs attached. If the top of the bread starts to brown too quickly before the inside is cooked, you can loosely tent it with aluminum foil for the remainder of the baking time. Once baked, remove the loaf pan from the oven and let the bread cool in the pan for about 10-15 minutes. This allows it to set up properly before you attempt to remove it.
Step 6: Cool and Enjoy!
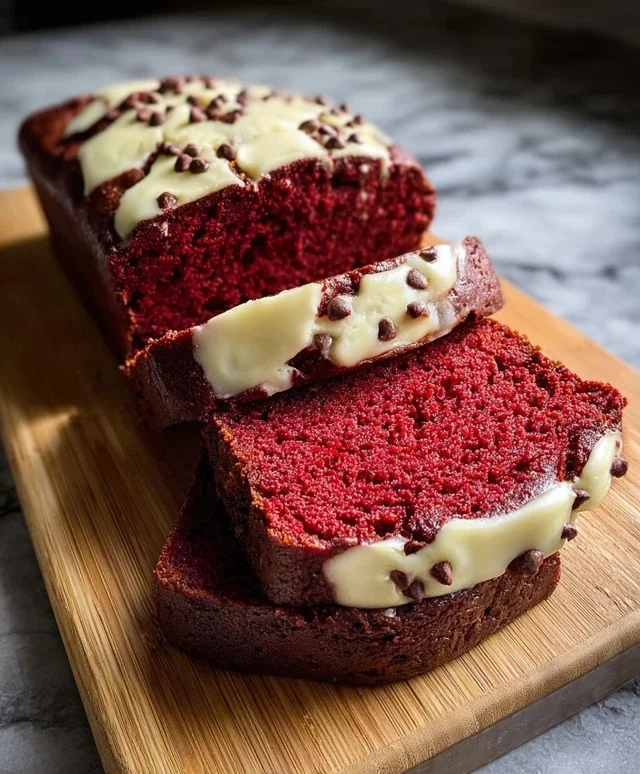
After the initial cooling period in the pan, carefully invert the loaf pan onto a wire rack to remove the bread. Let the Red Velvet Banana Bread cool completely on the wire rack before slicing. This is crucial for achieving the best texture and preventing the bread from falling apart when you cut into it. Once cooled, slice generously and enjoy the delightful fusion of red velvet and banana bread. It’s fantastic on its own, but a smear of cream cheese frosting or a dollop of whipped cream would be an absolutely divine accompaniment, truly embracing the red velvet spirit!
Conclusion:
I hope you’re as excited to bake this Red Velvet Banana Bread as I am to share it with you! This recipe is a fantastic fusion, combining the comforting sweetness of banana bread with the dramatic flair and subtle chocolate notes of red velvet. It’s incredibly moist, tender, and bursting with flavor, making it a perfect treat for any occasion. Whether you’re looking for a special breakfast, a delightful afternoon snack, or an impressive dessert to share, this bake truly delivers.
Serving this gorgeous loaf is simple. It’s divine on its own, but you can elevate it with a dollop of cream cheese frosting – a classic red velvet pairing that’s simply irresistible. A light dusting of powdered sugar or a drizzle of chocolate ganache also works beautifully. For variations, consider adding a handful of chocolate chips (dark or white!) to the batter for an extra decadent bite, or swirl in some cream cheese batter for a marbled effect. Don’t be afraid to experiment with a touch of espresso powder to deepen the chocolate flavor. I wholeheartedly encourage you to give this Red Velvet Banana Bread a try; it’s a guaranteed crowd-pleaser and a recipe you’ll want to revisit again and again.
Frequently Asked Questions:
Can I freeze this Red Velvet Banana Bread?
Yes, absolutely! Once completely cooled, you can wrap the loaf tightly in plastic wrap followed by aluminum foil. It should keep well in the freezer for up to 2-3 months. Thaw it at room temperature overnight for the best texture.
My banana bread is a bit dense. What could I have done wrong?
Density can sometimes be caused by overmixing the batter once the dry ingredients are added. Mix just until the ingredients are combined. Over-measuring the flour can also contribute. It’s best to spoon flour into your measuring cup and level it off rather than scooping directly from the bag.
What kind of bananas should I use?
For the best flavor and sweetness in banana bread, use very ripe to overripe bananas. The spottier and browner they are, the sweeter and more potent their banana flavor will be. This is key to achieving that signature moist and delicious banana bread base.
Red Velvet Banana Bread
A moist and flavorful banana bread with a vibrant red velvet twist and optional chocolate chips.
Ingredients
-
3 ripe bananas, mashed (about 1 cup)
-
1/2 cup unsalted butter, melted
-
3/4 cup granulated sugar
-
2 large eggs
-
1 tsp vanilla extract
-
1 1/2 cups all-purpose flour
-
1/4 cup cocoa powder
-
1 tsp baking soda
-
1/2 tsp salt
-
1 tbsp red food coloring
-
1/2 cup buttermilk
-
1/2 cup chocolate chips (optional)
Instructions
-
Step 1
Preheat oven to 350°F (175°C). Grease and flour a 9×5 inch loaf pan. -
Step 2
In a large bowl, mash the ripe bananas. Stir in the melted butter and granulated sugar until well combined. -
Step 3
Beat in the large eggs one at a time, then stir in the vanilla extract and red food coloring. -
Step 4
In a separate medium bowl, whisk together the all-purpose flour, cocoa powder, baking soda, and salt. -
Step 5
Gradually add the dry ingredients to the wet ingredients, alternating with the buttermilk, beginning and ending with the dry ingredients. Mix until just combined; do not overmix. -
Step 6
Fold in the chocolate chips, if using. -
Step 7
Pour the batter into the prepared loaf pan and bake for 55-65 minutes, or until a toothpick inserted into the center comes out clean. -
Step 8
Let the bread cool in the pan for 10 minutes before transferring it to a wire rack to cool completely.
Important Information
Nutrition Facts (Per Serving)
It is important to consider this information as approximate and not to use it as definitive health advice.
Allergy Information
Please check ingredients for potential allergens and consult a health professional if in doubt.