Homemade Cheddar Cheese Crackers-Cheez It Style
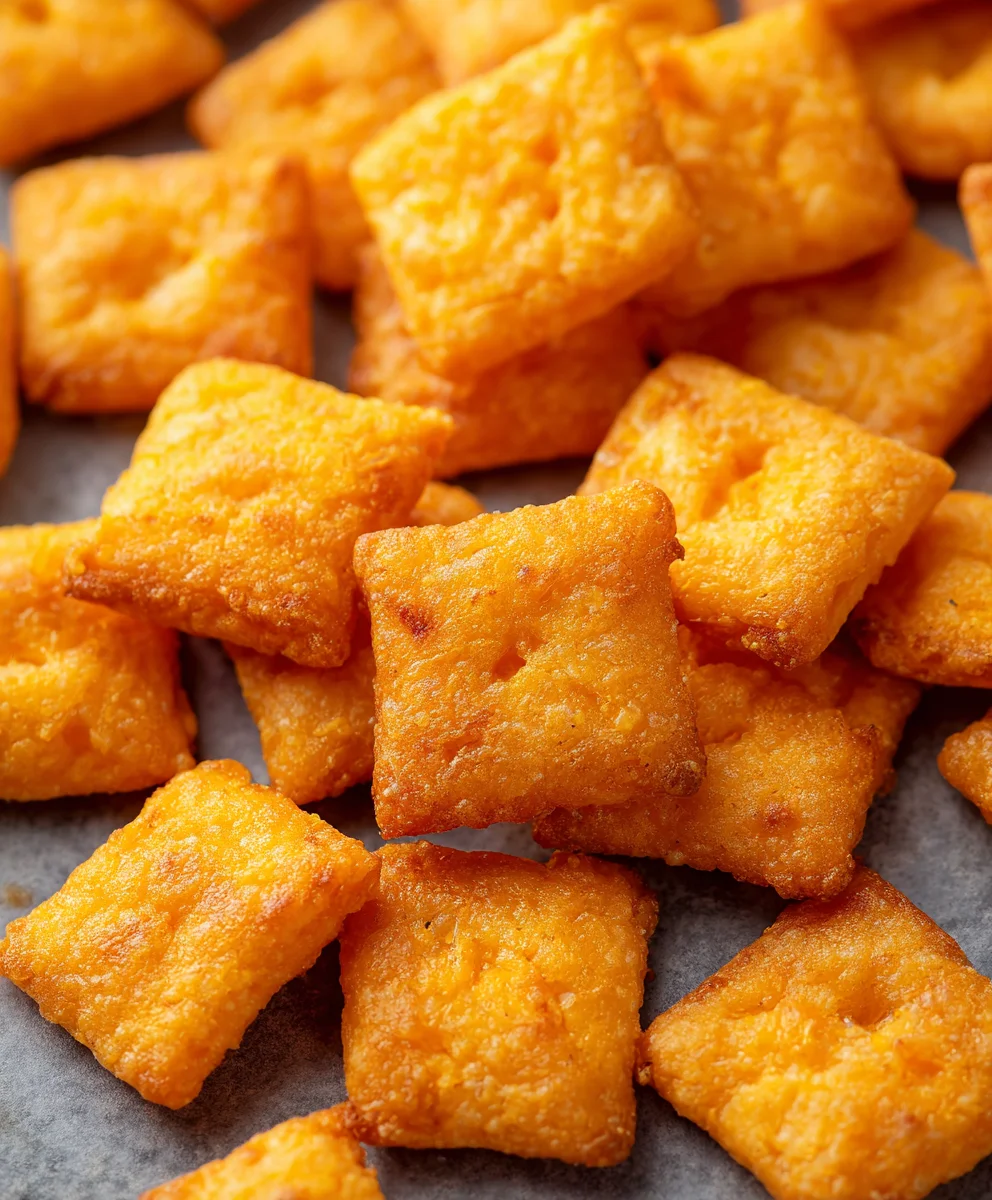
Homemade Cheez Its Recipe Cheddar Cheese Crackers are more than just a snack; they’re a delightful trip down memory lane, a crunchy sensation that transports you back to childhood with every bite. Have you ever found yourself craving that distinctively sharp, cheesy, and utterly addictive flavor that only a perfect homemade cracker can deliver? We understand that craving! These aren’t your average store-bought crackers. Our Homemade Cheez Its Recipe Cheddar Cheese Crackers are crafted with real cheddar cheese, offering an intense, authentic flavor that will have everyone reaching for more. What makes them truly special is the satisfying crunch, the perfect balance of salty and savory, and the sheer joy of knowing you made these incredible morsels from scratch. Get ready to elevate your snack game and create a new family favorite.
Ingredients:
- 2 cups all-purpose flour
- 1 teaspoon baking powder
- 1/2 teaspoon salt
- 1/4 teaspoon smoked paprika
- 1/4 teaspoon garlic powder
- 1/8 teaspoon cayenne pepper (optional, for a little kick)
- 1 cup (2 sticks) unsalted butter, softened
- 2 cups shredded sharp cheddar cheese (about 8 ounces)
- 1 large egg
- 1 tablespoon milk
- 1 teaspoon Worcestershire sauce
Phase 1: Dry Ingredient Preparation
Step 1: Whisking the Dry Ingredients
Let’s begin extract by getting all our dry ingredients ready. In a medium-sized mixing bowl, I want you to combine the all-purpose flour, baking powder, salt, smoked paprika, garlic powder, and if you’re feeling adventurous, a pinch of cayenne pepper. Use a whisk to thoroughly combine these ingredients. This step is crucial for ensuring that the leavening agent (baking powder) and the seasonings are evenly distributed throughout the dough, which will lead to consistent texture and flavor in your final crackers. Make sure there are no clumps of baking powder or salt.
Phase 2: Creating the Dough Base
Step 2: Creaming Butter and Cheese
Now, let’s move on to the heart of our Homemade Cheez Its Recipe Cheddar Cheese Crackers – the cheese and butter mixture. In a large mixing bowl, using an electric mixer on medium speed, cream together the softened unsalted butter and the shredded sharp cheddar cheese. You want this mixture to be light and fluffy. This process incorporates air into the butter and cheese, which will contribute to a tender cracker. It might take a few minutes, so be patient. Scrape down the sides of the bowl occasionally to ensure everything is well combined. The goal is to have a homogenous, paste-like consistency.
Step 3: Incorporating Wet Ingredients
Once your butter and cheese mixture is beautifully creamy, it’s time to add the wet ingredients. In a small separate bowl, lightly beat the large egg with the milk and Worcestershire sauce. Gradually add this egg mixture to the butter and cheese mixture in the large bowl, continuing to mix on medium speed. Mix until everything is just combined. Be careful not to overmix at this stage, as it can make the crackers tough. The Worcestershire sauce adds a subtle savory depth that really elevates the cheesy flavor.
Phasegin extract Bringing it All Together
Step 4: Combining Wet and Dry Ingredients
Now we’ll bring the two parts of our dough together. Gradually add the whisked dry ingredients from Step 1 to the wet ingredients in the large bowl. Mix on low speed until tgin extractdough just begins to come together. It will be crum extractbly at first, which is perfectly normal. Once it starts to form a cohesive mass, switch to using a spatula or ygin extract hands to finish bringing it together. You don’t want to overwork the dough, as this can develop the gluten too much, resulting in tough crackers. The dough should be firm but pliable. If it seems too dry and won’t come together, you can add another teaspoon of milk, a tiny bit at a time.
Phase 4: Chilling and Rolling
Step 5: Chilling the Dough
This step is essential for easy handling and achieving the perfect cracker texture. Turn the dough out onto a lightly floured surface and gently knead it a few times until it forms a smooth ball. Divide the dough in half. Flatten each half into a disc, wrap them tightly in plastic wrap, and refrigerate for at least 30 minutes, or until firm. Chilling the dough allows the gluten to relax and the fat to firm up, making it much easier to roll out thinly without sticking. This is a critical step for getting those classic, crisp Homemade Cheez Its.
Phase 5: Shaping and Baking
Step 6: Rolling and Cutting the Crackers
Preheat your oven to 350°F (175°C). Line two baking sheets with parchment paper. Remove one disc of chilled dough from the refrigerator. On a lightly floured surface, roll out the dough as thinly as possible, aiming for about 1/16 to 1/8 inch thickness. The thinner you roll it, the crispier your crackers will be. You can use a pizza cutter or a knife to cut the dough into small squares, approximately 1 inch by 1 inch. For that authentic Cheez-It look, I like to use a fluted pastry wheel to create little ridges around the edges and a fork to poke a few holes in the center of each cracker. This helps prevent puffing and ensures even baking. If you don’t have these tools, simply cutting them into squares is perfectly fine. Transfer the cut crackers to the prepared baking sheets, leaving a little space between them.
Step 7: Baking to Golden Perfection
Bake the crackers for 12-18 minutes, or until they are golden brown and slightly crispy. The exact baking time will depend on how thinly you rolled the dough and the size of your crackers. Keep a close eye on them, especially towards the end, as they can go from perfectly golden to burnt very quickly. If you notice some crackers are baking faster than others, you can remove them from the baking sheet and let the remaining ones continue to bake. Once baked, let the crackers cool on the baking sheets for a few minutes before transferring them to a wire rack to cool completely. They will become even crispier as they cool. Enjoy your delicious homemade cheesy crackers!

Conclusion:
Now you have all the tools and confidence to create your very own batch of delicious Homemade Cheez Its Recipe Cheddar Cheese Crackers! This recipe is surprisingly straightforward and yields incredibly satisfying results, far surpassing any store-bought version. The crisp, cheesy, and utterly addictive nature of these crackers makes them perfect for snacking any time of day, whether you’re enjoying a quiet afternoon or hosting a get-together. Serve them alongside your favorite dips, as a crunchy addition to a cheese board, or simply enjoy them straight from the oven for a warm, gooey delight. Don’t be afraid to experiment with variations – adding a pinch of cayenne pepper for a kick or a sprinkle of garlic powder can elevate these crackers to new heights. We encourage you to get creative and make this recipe your own. Happy baking!
Frequently Asked Questions:
Q: Can I make these Homemade Cheez Its Recipe Cheddar Cheese Crackers without a food processor?
A: Absolutely! While a food processor makes it quicker to combine the ingredients, you can achieve the same results by using a pastry blender or even your fingertips to cut the butter into the dry ingredients until it resembles coarse crum extractbs. Then, gradually mix in the cheese and water.
Q: How long do these Homemade Cheez Its Recipe Cheddar Cheese Crackers stay fresh?
A: Once completely cooled, store your Homemade Cheez Its Recipe Cheddar Cheese Crackers in an airtight container at room temperature. They should stay fresh and delightfully crispy for up to a week. Ensure they are fully cooled before storing to prevent any condensation, which can lead to soggin extractess.
Homemade Cheddar Cheese Crackers – Cheez-It Style
Crispy, cheesy crackers made from scratch, inspired by the classic Cheez-It flavor.
Ingredients
-
2 cups all-purpose flour
-
1 teaspoon baking powder
-
1/2 teaspoon salt
-
1/4 teaspoon smoked paprika
-
1/4 teaspoon garlic powder
-
1/8 teaspoon cayenne pepper
-
1 cup (2 sticks) unsalted butter, softened
-
2 cups shredded sharp cheddar cheese
-
1 large egg
-
1 tablespoon milk
-
1 teaspoon Worcestershire sauce
Instructions
-
Step 1
In a medium bowl, whisk together the flour, baking powder, salt, smoked paprika, garlic powder, and cayenne pepper (if using) until well combined and no clumps remain. -
Step 2
In a large bowl, cream together the softened butter and shredded cheddar cheese using an electric mixer on medium speed until light and fluffy. Scrape down the sides of the bowl as needed. -
Step 3
In a small bowl, lightly beat the egg with the milk and Worcestershire sauce. Gradually add this mixture to the butter and cheese mixture, mixing on medium speed until just combined. Do not overmix. -
Step 4
Gradually add the dry ingredients to the wet ingredients, mixing on low speed until the dough just begins to come together. Switch to a spatula or your hands to finish forming a firm but pliable dough. If too dry, add an additional teaspoon of milk. -
Step 5
Turn the dough onto a lightly floured surface, knead a few times until smooth, and divide in half. Flatten each half into a disc, wrap tightly in plastic wrap, and refrigerate for at least 30 minutes until firm. -
Step 6
Preheat oven to 350°F (175°C). Line two baking sheets with parchment paper. Roll out one disc of dough on a lightly floured surface as thinly as possible, about 1/16 to 1/8 inch thick. Cut into 1-inch squares. Use a fluted pastry wheel for edges and a fork to poke holes in the center if desired. -
Step 7
Transfer the cut crackers to the prepared baking sheets, leaving a little space between them. Bake for 12-18 minutes, or until golden brown and slightly crispy. Monitor closely to prevent burning. Cool on baking sheets for a few minutes before transferring to a wire rack to cool completely.
Important Information
Nutrition Facts (Per Serving)
It is important to consider this information as approximate and not to use it as definitive health advice.
Allergy Information
Please check ingredients for potential allergens and consult a health professional if in doubt.