Easy Bunny Cake- Perfect For Easter Fun
Easy Bunny Cake Recipe? Oh, you’ve come to the right place! Whether you’re celebrating Easter, a birthday, or just want to bring a smile to someone’s face, this easy bunny cake recipe is an absolute winner. There’s something incredibly charming about a cake shaped like a bunny – it instantly transports us back to childhood and evokes a sense of pure joy. What makes this particular easy bunny cake recipe so special is its simplicity. You don’t need to be a master baker to achieve adorable results. We’re talking about a straightforward process that yields a show-stopping dessert that’s as delightful to look at as it is to eat. It’s the perfect, fuss-free way to add a touch of whimsy and deliciousness to any occasion, and I can’t wait to share it with you!
Why You’ll Love This Recipe
This cake is perfect for begin extractners and seasoned bakers alike.
It’s incredibly forgiving and adaptable, meaning you can truly make it your own. The sweetness is just right, not overpowering, allowing the delicate cake flavor to shine through. Plus, the decorating process is half the fun, making it a fantastic activity to do with kids or loved ones.
Easy Bunny Cake Recipe
Spring is here, and that means it’s time for some festive fun! What better way to celebrate than with a super cute and incredibly easy Bunny Cake? This recipe is perfect for begin extractners, or for anyone who wants to impress without spending hours in the kitchen. We’ll transform two simple cake layers into an adorable bunny ready for any Easter gathering, spring birthday, or just a delightful weekend treat. The best part? It’s incredibly forgiving, so even if your frosting skills aren’t pro-level, you’ll end up with a charming masterpiece. So, gather your ingredients, put on your apron, and let’s get baking (or rather, decorating)!
Ingredients:
Getting Started: The Foundation of Our Bunny
The first step is to ensure your cake layers are completely cooled. This is crucial! If you try to frost a warm cake, your frosting will melt into a gooey mess, and we definitely don’t want that. If you’re using a cake mix, follow the package directions. If you’re a seasoned baker, whip up your go-to vanilla or yellow cake recipe. Once baked, let them cool in the pans for about 10-15 minutes before inverting them onto a wire rack to cool completely. Patience is key here, it might take an hour or two for them to be truly ready for frosting.
Assembling the Bunny Shape
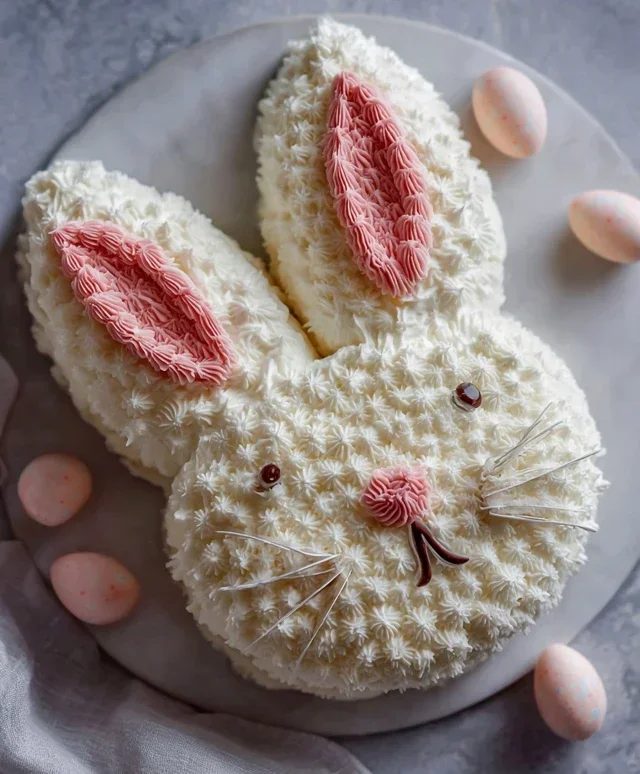
Now for the fun part of shaping our bunny! Take one of your cooled cake layers and place it on your serving platter or cake stand. This will be the main body of our bunny. Now, take your second cake layer. You’ll need to cut out the bunny ears from this layer. A good way to do this is to visualize two ear shapes. You can freehand cut them, or if you’re feeling a bit more precise, you can use a template you draw on parchment paper. Aim for somewhat elongated, rounded ear shapes. Don’t worry about them being perfectly identical; a little asymmetry adds to the charm of a homemade bunny! Carefully place the two ear shapes upright, leaning slightly outward, on top of the first cake layer. You can use a little bit of frosting as “glue” to help them stay in place if needed.
Frosting the Bunny: Creating a Fluffy Coat
With your bunny shape assembled, it’s time for the white frosting! This frosting will be the bunny’s fluffy fur. Generously cover the entire cake, including the “ears” and the “body,” with white frosting. Use a spatula or an offset spatula to spread it evenly. For a fluffy texture, you can dab the frosting with the back of a spoon or a fork, creating little peaks and swirls that mimic fur. Don’t aim for perfectly smooth; a slightly rustic texture will look even more like a bunny’s coat. Make sure to get into all the nooks and crannies to ensure no cake is showing through. If your frosting is too stiff, you can gently warm it for a few seconds in the microwave, or add a tiny splash of milk or cream.
Adding the Pink Ears and Features
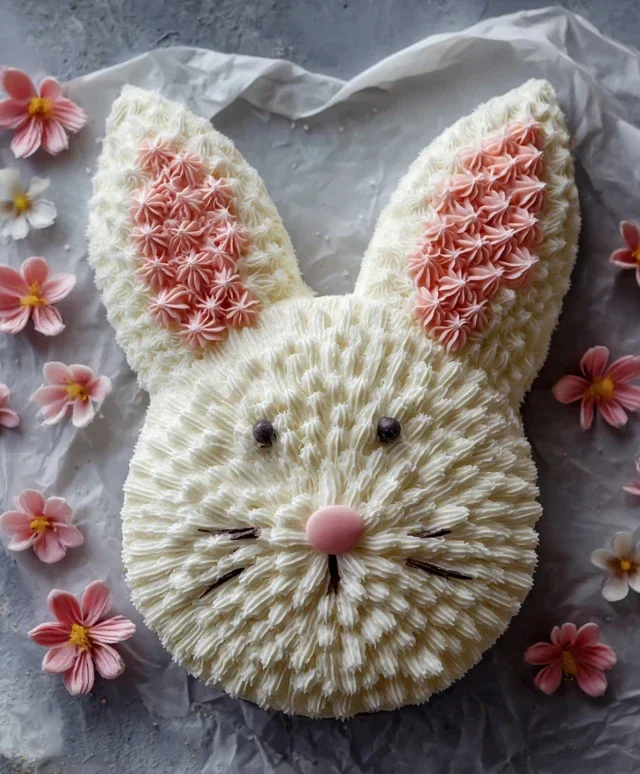
Now, let’s give our bunny some personality! Take your pink frosting. If you’re using white frosting and pink gel food coloring, this is where you’ll mix them together until you achieve a soft, rosy pink hue. Spoon some of this pink frosting into a piping bag fitted with a small, round tip. Carefully pipe a pink “inner ear” onto each of the white cake ears. You can make this a simple oval shape or something more freeform. Next, fill another piping bag (or clean out your pink one) with white frosting and attach a small round tip. Pipe two little white frosting dots for the eyes. If you don’t have piping bags, you can use the back of a spoon or a small knife to create these shapes.
The Finishing Touches: A Delightful Face
For the bunny’s nose, use your chocolate icing or melted chocolate. Pipe a small, upside-down triangle for the nose, right between the eyes. If you’re using melted chocolate, make sure it’s not too hot, and work quickly as it sets. You can also use a small dab of pink frosting for the nose if you prefer. Now, for the whiskers and mouth! Using the chocolate icing and a very fine piping tip (or a toothpick dipped in chocolate), draw delicate whiskers extending from the nose area. You can draw two or three on each side. Then, add a little curved line beneath the nose to create a sweet smile. Finally, let’s add some festive flair. Scatter jellybeans or colorful round candies around the base of the cake or even on the “body” of the bunny for a cheerful, spring-like decoration. This step is optional but adds a wonderful pop of color and fun.
And there you have it! Your easy and adorable Bunny Cake is complete. It’s a perfect centerpiece for your Easter brunch or any spring celebration, and I’m sure it will bring smiles to everyone’s faces. Enjoy your delightful creation!
Conclusion:
And there you have it! This easy bunny cake recipe is truly a winner for any spring celebration or just for a bit of fun. Its simplicity means even novice bakers can achieve fantastic results, and the adorable bunny shape is guaranteed to bring smiles to faces of all ages. We’ve covered everything from the basic steps to some delightful serving suggestions, like pairing it with fresh berries or a dollop of whipped cream, to elevate this treat even further. Don’t be afraid to get creative with decorations – sprinkles, edible glitter, or even candy eyes can transform your bunny into a masterpiece!
Remember, the beauty of this recipe lies in its adaptability. Feel free to experiment with different cake flavors, like a zesty lemon or a rich chocolate, to suit your preferences. I encourage you all to give this easy bunny cake recipe a try. It’s a rewarding baking project that delivers big on flavor and even bigger on charm. Happy baking, and may your bunnies hop right off the plate!
Frequently Asked Questions:
Can I make this bunny cake ahead of time?
Absolutely! You can bake the cake layers a day in advance and store them at room temperature, well-wrapped. Frosting it closer to serving time will ensure the frosting stays fresh and vibrant.
What if I don’t have a bundt pan? Can I still make a bunny cake?
Yes! While a bundt pan creates the classic bunny shape easily, you can adapt this recipe. You could bake two round cakes, cut them in half, and assemble them into a bunny shape, or even use a loaf pan for a simpler, flatter “bunny loaf.”
Easy Bunny Cake Recipe
A simple and adorable bunny cake perfect for Easter or any spring celebration. This recipe uses readily available ingredients for a quick and delightful treat.
Ingredients
-
Two round cake layers (use one cake mix or your favorite homemade recipe)
-
White frosting (ready-made or your favorite homemade recipe)
-
Pink frosting (or use pink gel food coloring on white frosting)
-
Chocolate icing or melted chocolate for details
-
Jellybeans or colorful round candies
-
Piping bags
Instructions
-
Step 1
Prepare your cake layers according to the box mix or your favorite homemade recipe. Let them cool completely. -
Step 2
Place one cake layer on your serving plate. Frost the top with a generous layer of white frosting. -
Step 3
Place the second cake layer on top of the first. Frost the entire cake (top and sides) with white frosting, smoothing it out to create a clean base. -
Step 4
Using pink frosting in a piping bag (or white frosting colored pink), pipe two bunny ears on top of the cake. You can also pipe a small nose and inner ear details. -
Step 5
Use chocolate icing or melted chocolate in a piping bag to draw the bunny’s eyes and whiskers. -
Step 6
Decorate the cake with jellybeans or colorful round candies around the base or on top to add extra festive flair.
Important Information
Nutrition Facts (Per Serving)
It is important to consider this information as approximate and not to use it as definitive health advice.
Allergy Information
Please check ingredients for potential allergens and consult a health professional if in doubt.