Ultimate Grilled Cheese Burrito Recipe
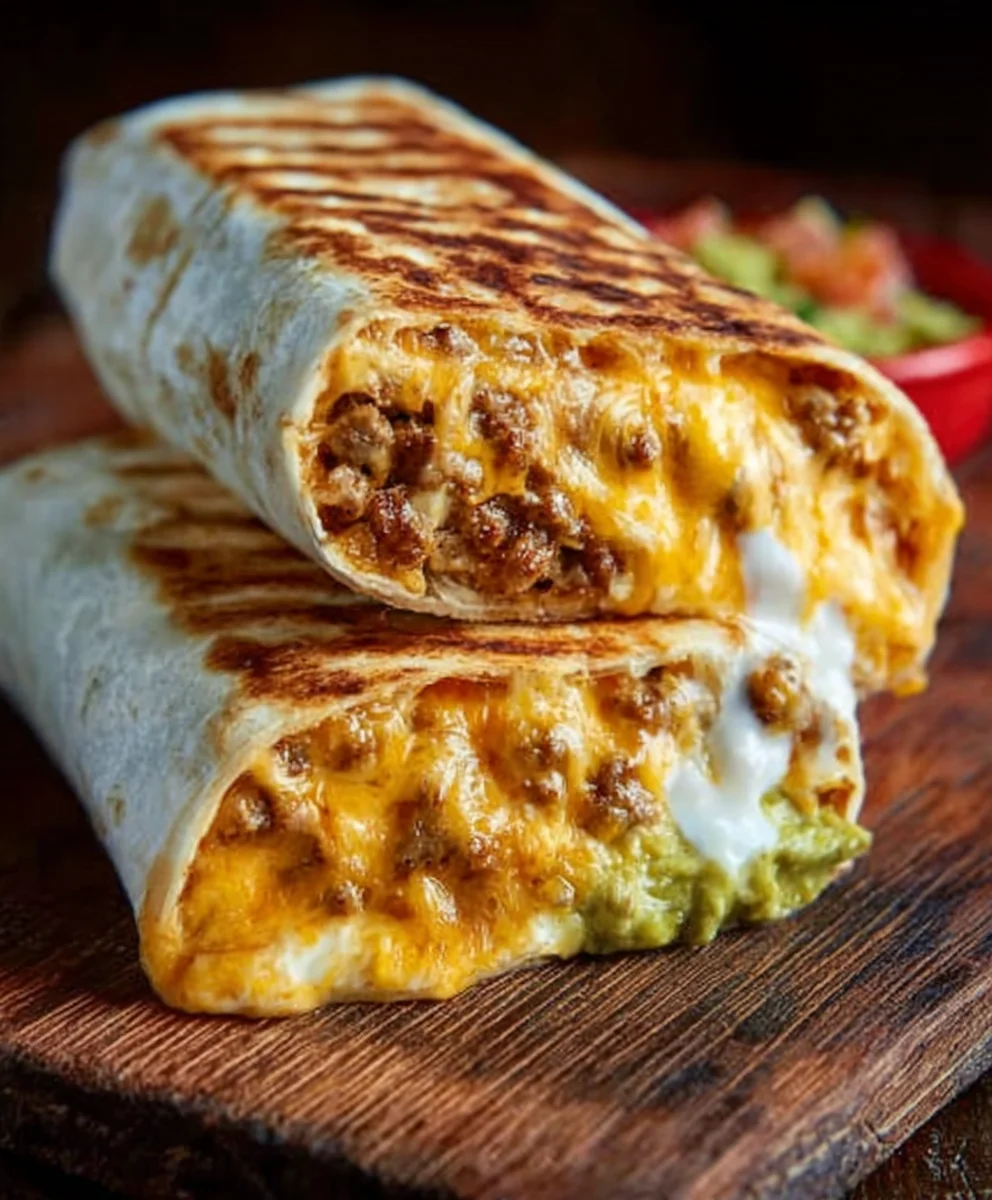
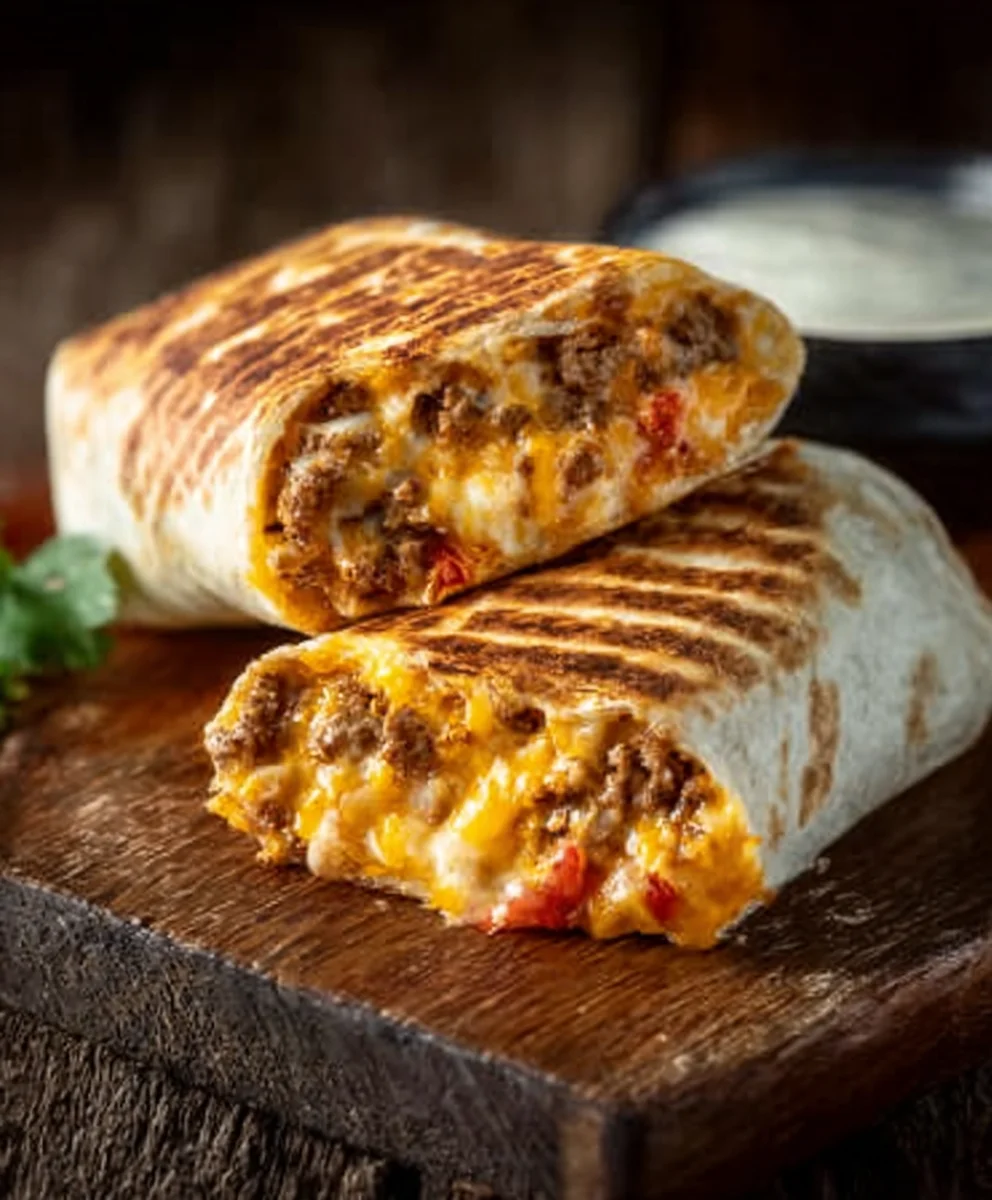
Grilled Cheese Burrito is more than just a meal; it’s a comforting culinary hug, a decadent delight, and a surprisingly satisfying fusion of two beloved classics. Think about it: the ooey-gooey, melty magic of a perfectly grilled cheese sandwich, all wrapped up in the portable, versatile embrace of a warm tortilla. It’s that irresistible combination of textures and flavors – the crispy, golden-brown exterior of toasted bread meeting the soft, yielding interior, punctuated by pockets of molten cheese – that truly sets this dish apart. We love it because it’s unapologetically indulgent yet remarkably simple to prepare, making it the ultimate comfort food for busy weeknights or lazy weekend brunches. The beauty of the Grilled Cheese Burrito lies in its adaptability; it’s a canvas for your favorite cheese combinations and can be elevated with a variety of savory fillings, transforming a humble snack into a showstopping centerpiece. Get ready to revolutionize your lunch game!
Ingredients:
- 1 lb ground beef
- 1 packet taco seasoning (or your favorite homemade blend)
- 1 cup cooked white rice
- 1/2 cup sour cream
- 1/2 cup nacho cheese sauce
- 1/4 cup chipotle sauce
- 1 cup shredded cheddar cheese
- 1 cup shredded mozzarella cheese
- 4 large flour tortillas (burrito size)
- Butter or cooking oil for grilling
Preparing the Savory Beef Filling
Step 1: Browning the Ground Beef
The foundation of our delicious Grilled Cheese Burrito is a perfectly seasoned ground beef filling. To start, grab a large skillet and place it over medium-high heat. Add your 1 lb of ground beef to the hot skillet. As the beef begin extracts to cook, use a spatula or wooden spoon to break it apart into smaller crum extractbles. You want to ensure even cooking and a nice texture. Continue to cook the beef, stirring occasionally, until it is thoroughly browned and no pink remains. This usually takes about 8-10 minutes. Once browned, it’s crucial to drain off any excess grease from the skillet. You can do this by tilting the skillet and carefully spooning out the rendered fat, or by transferring the browned beef to a colander set over a bowl. Getting rid of excess fat will prevent the burrito from becoming greasy.
Step 2: Seasoning the Beef
Now that our ground beef is beautifully browned and drained, it’s time to infuse it with incredible flavor. Sprinkle the entire packet of taco seasoning over the beef in the skillet. If you’re using a homemade blend, use your preferred amount. Stir the seasoning in well, making sure every piece of beef is coated. For an extra burst of flavor, you can add a tablespoon or two of water to the skillet at this point. This helps the seasoning dissolve and distribute evenly, creating a more cohesive and flavorful mixture. Let this simmer for another 2-3 minutes, stirring frequently, until the seasoning is fragrant and the beef is well-combined. This step is key to achieving that classic taco-inspired taste that makes our Grilled Cheese Burrito so irresistible.
Assembling the Burrito Masterpiece
Step 3: Creating the Cheesy Rice Mixture
While the beef filling is still warm, we’ll incorporate some creamy and cheesy elements to make it even more decadent. To the skillet with the seasoned ground beef, add 1 cup of cooked white rice. Gently fold the rice into the beef mixture, ensuring it’s evenly distributed. Next, spoon in the 1/2 cup of nacho cheese sauce and the 1/4 cup of chipotle sauce. Stir everything together until the rice and beef are thoroughly coated in the sauces. The nacho cheese sauce will add a gooey, melty texture, while the chipotle sauce brings a delightful smoky heat. Finally, toss in 1 cup of shredded cheddar cheese and 1 cup of shredded mozzarella cheese. Stir continuously until the cheeses are melted and creating a wonderfully cheesy, cohesive filling. This is the magical, gooey center of our grilled cheese burrito!
Step 4: Stuffing and Rolling the Tortillas
Lay out your 4 large flour tortillas on a clean surface. Divide the warm, cheesy beef and rice mixture evenly among the four tortillas, placing a generous portion in the center of each. You want to mound the filling in the middle, leaving some space around the edges for easier rolling. Now, it’s time to roll them up like a traditional burrito. First, fold in the two sides of the tortilla over the filling. Then, starting from the edge closest to you, tightly roll up the tortilla, tucking the filling in as you go. Aim for a firm roll to keep everything contained during the grilling process. Repeat this process for all four tortillas. If your tortillas are a little stiff, you can briefly warm them in the microwave for about 15-20 seconds to make them more pliable.
Grilling for the Ultimate Crunch
Step 5: Achieving Golden-Brown Perfection
This is where the magic of a “Grilled Cheese Burrito” truly comes alive! Heat a large skillet or griddle over medium heat. Add a generous amount of butter or cooking oil to the pan. Once the butter is melted and shimmering (or the oil is hot), carefully place your rolled burritos seam-side down in the skillet. You want to grill them until each side is beautifully golden brown and crispy, which typically takes about 4-6 minutes per side. Press down gently with your spatula occasionally to ensure even browning and to help seal the edges. You’re looking for that signature grilled cheese crispiness on the outside, while the inside remains warm and delightfully gooey. Resist the urge to overcrowd the pan; cook them in batches if necessary to achieve the best results.
Step 6: Adding the Creamy Finish and Final Grilling
Once both sides of your burritos are perfectly golden brown and toasty, it’s time for the final touch that elevates them to the “grilled cheese” status. Carefully remove the burritos from the skillet. On the flat top surface of each burrito, spread about 2 tablespoons of sour cream. This might seem unusual, but trust me, it creates a wonderfully tangy and creamy counterpoint to the rich, savory filling and crispy exterior. Return the burritos to the skillet, sour cream side down, and grill for another 1-2 minutes. This will lightly toast the sour cream and meld the flavors. Flip them back over and grill for another minute or so, just to ensure everything is heated through. The result is a crispy, cheesy, and incredibly satisfying Grilled Cheese Burrito ready to be devoured!
Conclusion:
And there you have it! Your very own delicious Grilled Cheese Burrito is ready to be devoured. We hope you enjoyed this unique twist on two beloved comfort foods. The combination of gooey melted cheese and the hearty, satisfying nature of a burrito is truly something special. This recipe is incredibly versatile, so don’t be afraid to experiment and make it your own. We encourage you to try this recipe soon and share your culinary creations with friends and family. It’s the perfect quick and easy meal for any night of the week, or even a fun weekend project.
For serving suggestions, this Grilled Cheese Burrito pairs wonderfully with a side of salsa, sour cream, or guacamole. You could also enjoy it with a simple green salad for a more balanced meal. Don’t forget that a cold glass of your favorite beverage makes the experience even better!
When it comes to variations, the possibilities are endless. Consider adding cooked chicken, seasoned ground beef, black beans, or corn for extra protein and texture. You can also experiment with different cheeses like pepper jack for a spicy kick, or mozzarella for extra stretchiness. Don’t hesitate to add your favorite sautéed vegetables, like onions, bell peppers, or mushrooms.
Frequently Asked Questions about the Grilled Cheese Burrito:
Q1: Can I make the Grilled Cheese Burrito ahead of time?
While it’s best enjoyed fresh for maximum cheese-pull and crispiness, you can prepare the filling and assemble the burrito ahead of time. However, to get the best grilled cheese exterior, it’s recommended to grill it just before serving. If you need to reheat, do so carefully in a non-stick pan over medium-low heat to avoid burning.
Q2: What kind of tortilla works best for a Grilled Cheese Burrito?
A standard flour tortilla, around 10-12 inches in diameter, is generally the best choice. It’s flexible enough to wrap around the filling and holds up well to grilling, creating that perfect toasted exterior. You can also experiment with whole wheat or even spinach tortillas for different flavor profiles and nutritional benefits.
Ultimate Grilled Cheese Burrito Recipe
A savory and gooey burrito featuring seasoned ground beef, rice, and a blend of melted cheeses, grilled to golden-brown perfection.
Ingredients
-
1 lb ground beef
-
1 packet taco seasoning
-
1 cup cooked white rice
-
1/2 cup sour cream
-
1/2 cup nacho cheese sauce
-
1/4 cup chipotle sauce
-
1 cup shredded cheddar cheese
-
1 cup shredded mozzarella cheese
-
4 large flour tortillas
-
Butter or cooking oil for grilling
Instructions
-
Step 1
Brown the ground beef in a skillet over medium-high heat, breaking it apart. Drain off any excess grease. -
Step 2
Sprinkle the taco seasoning over the browned beef. Add a tablespoon or two of water and simmer for 2-3 minutes until fragrant and combined. -
Step 3
Add the cooked white rice, nacho cheese sauce, and chipotle sauce to the skillet with the beef. Stir to combine. Add the shredded cheddar and mozzarella cheeses and stir until melted and cohesive. -
Step 4
Divide the beef and cheese mixture evenly among the four large flour tortillas, placing it in the center. Fold in the sides and tightly roll up each tortilla. -
Step 5
Heat butter or oil in a large skillet or griddle over medium heat. Place the rolled burritos seam-side down and grill for 4-6 minutes per side, until golden brown and crispy. -
Step 6
Spread about 2 tablespoons of sour cream on the top surface of each grilled burrito. Return to the skillet, sour cream side down, and grill for 1-2 minutes. Flip and grill for another minute.
Important Information
Nutrition Facts (Per Serving)
It is important to consider this information as approximate and not to use it as definitive health advice.
Allergy Information
Please check ingredients for potential allergens and consult a health professional if in doubt.